2023 · Product Design
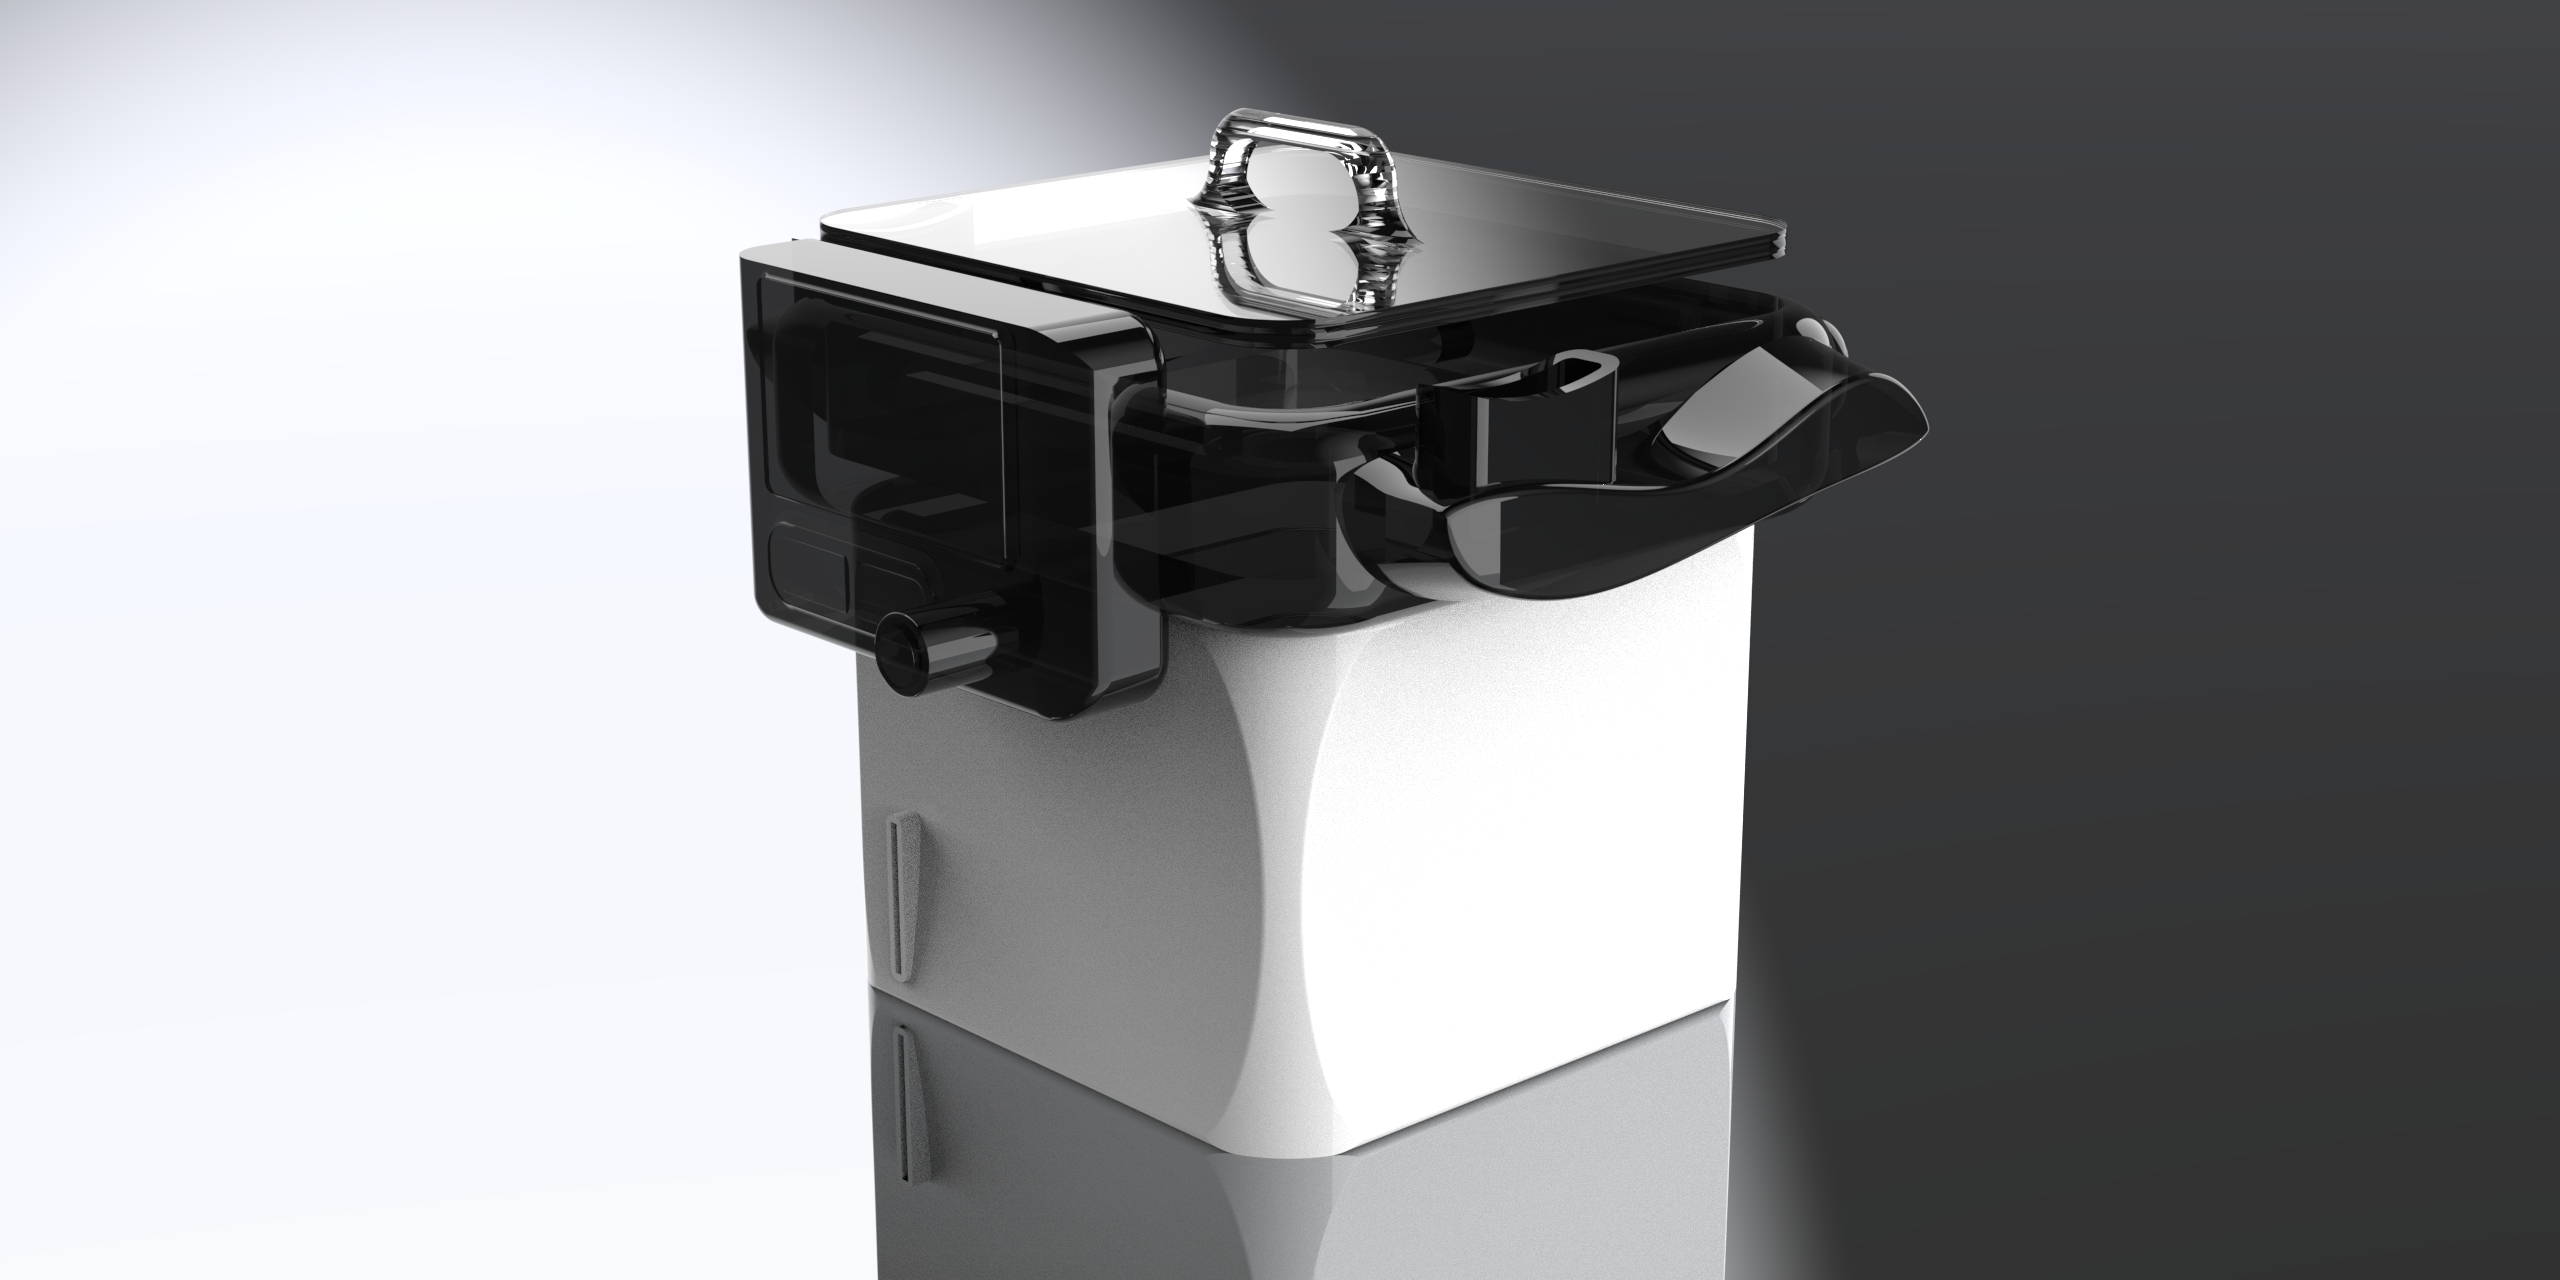
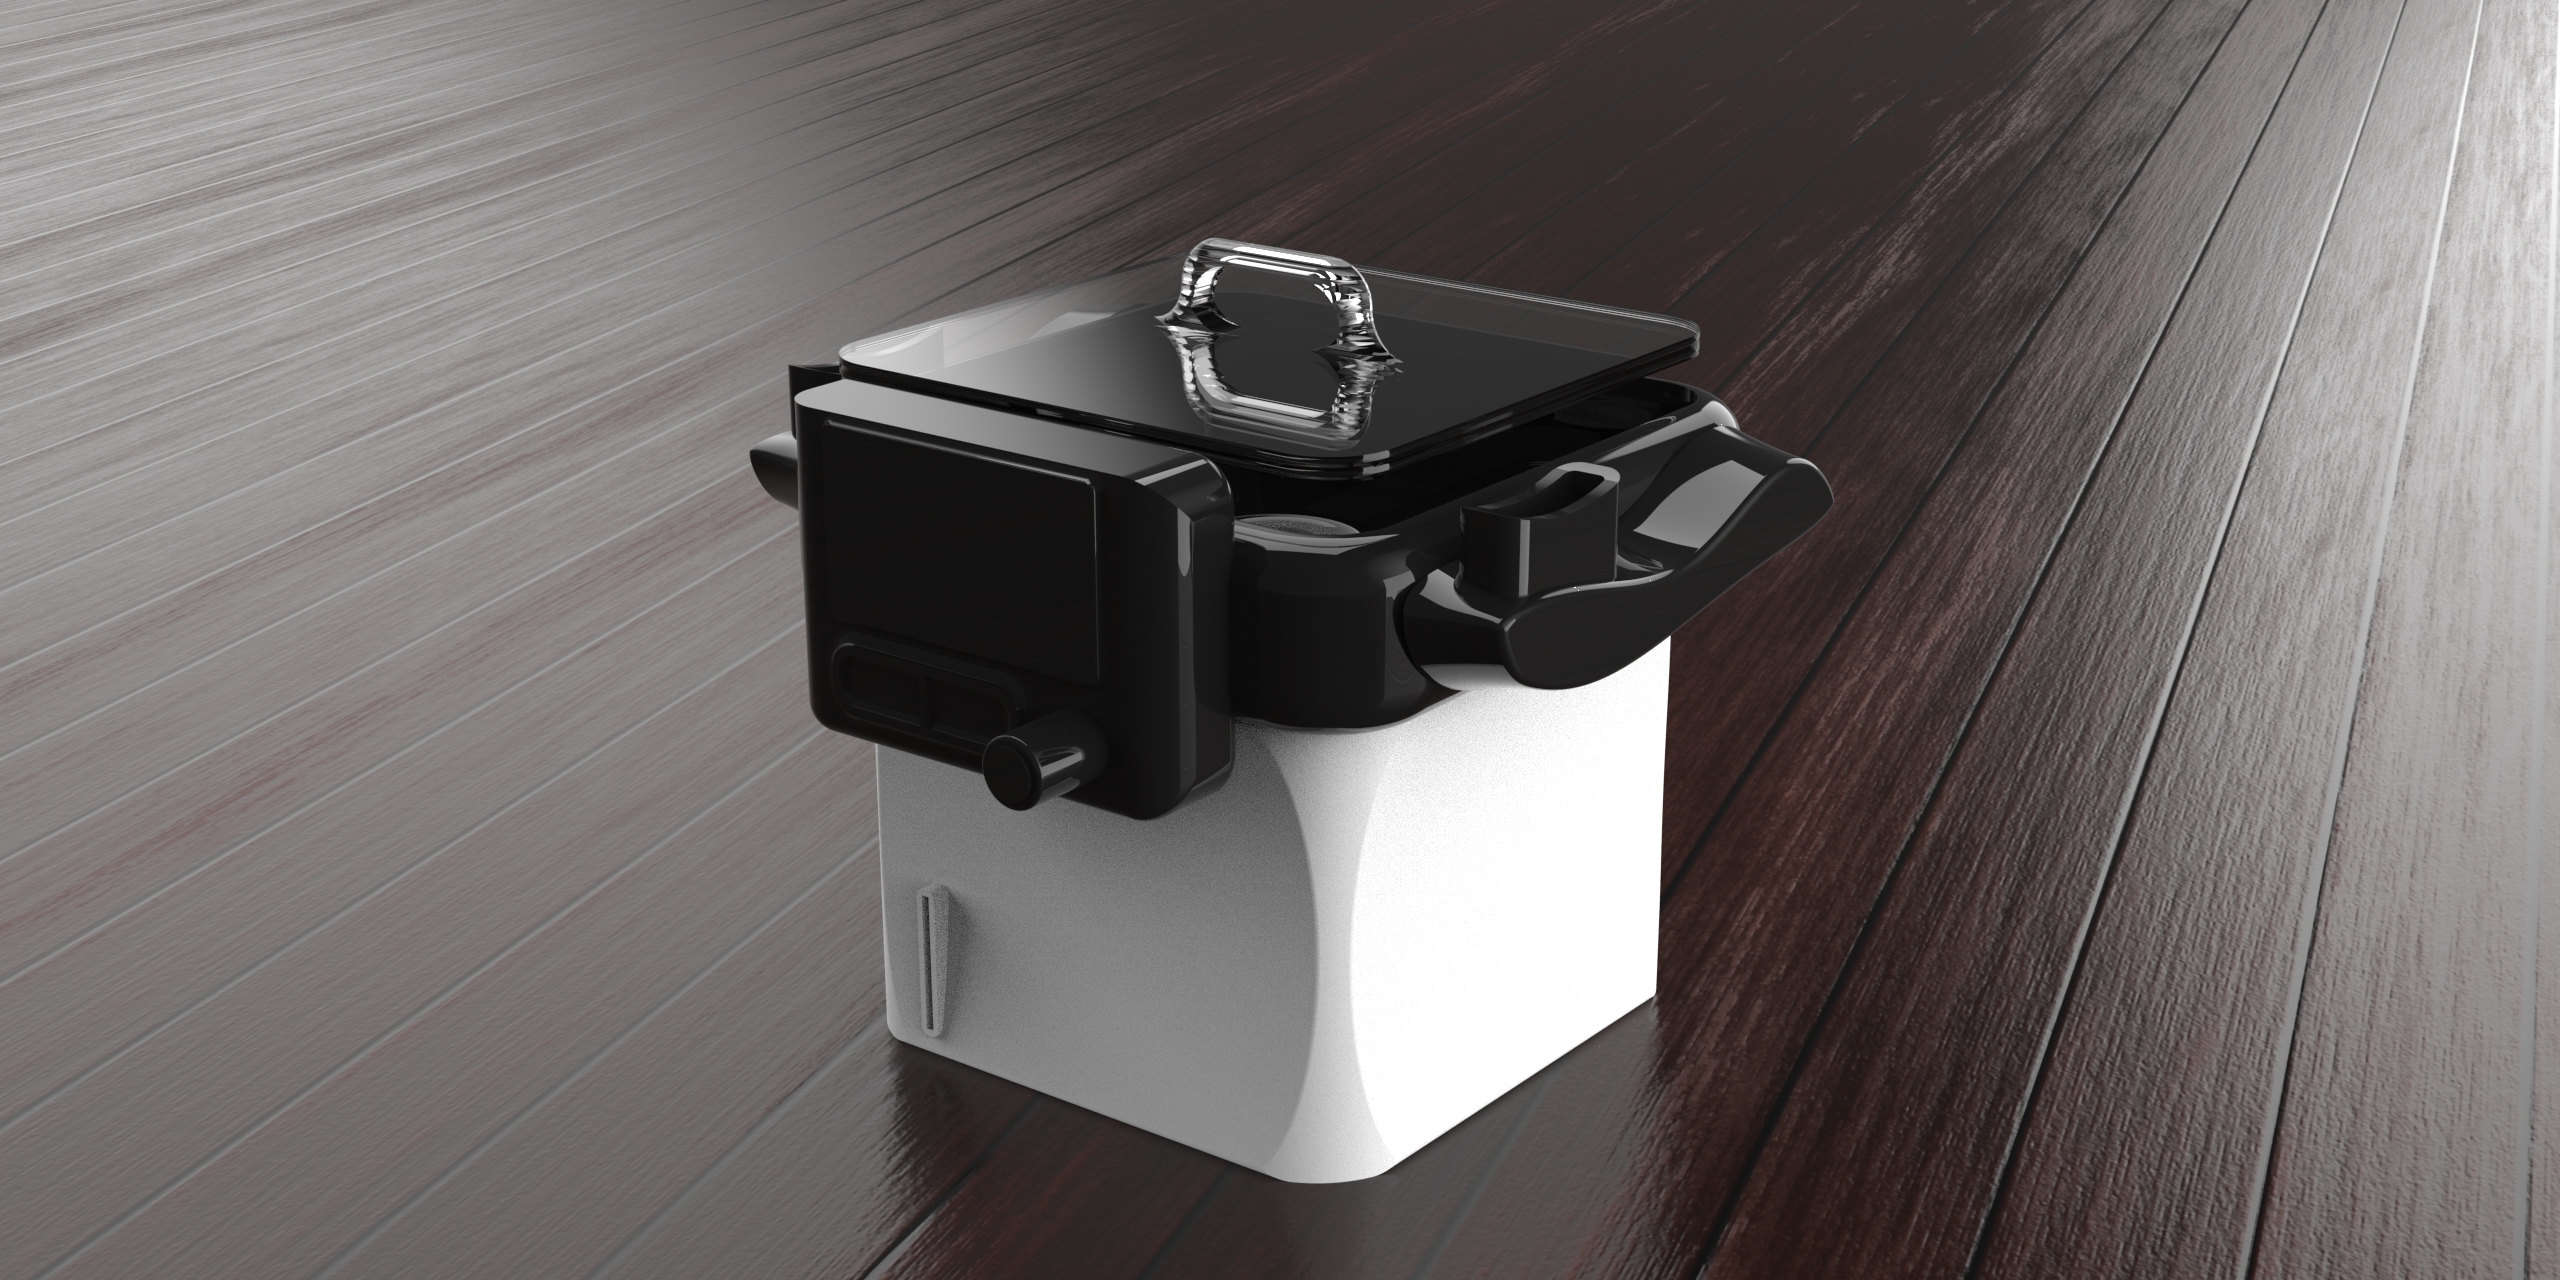
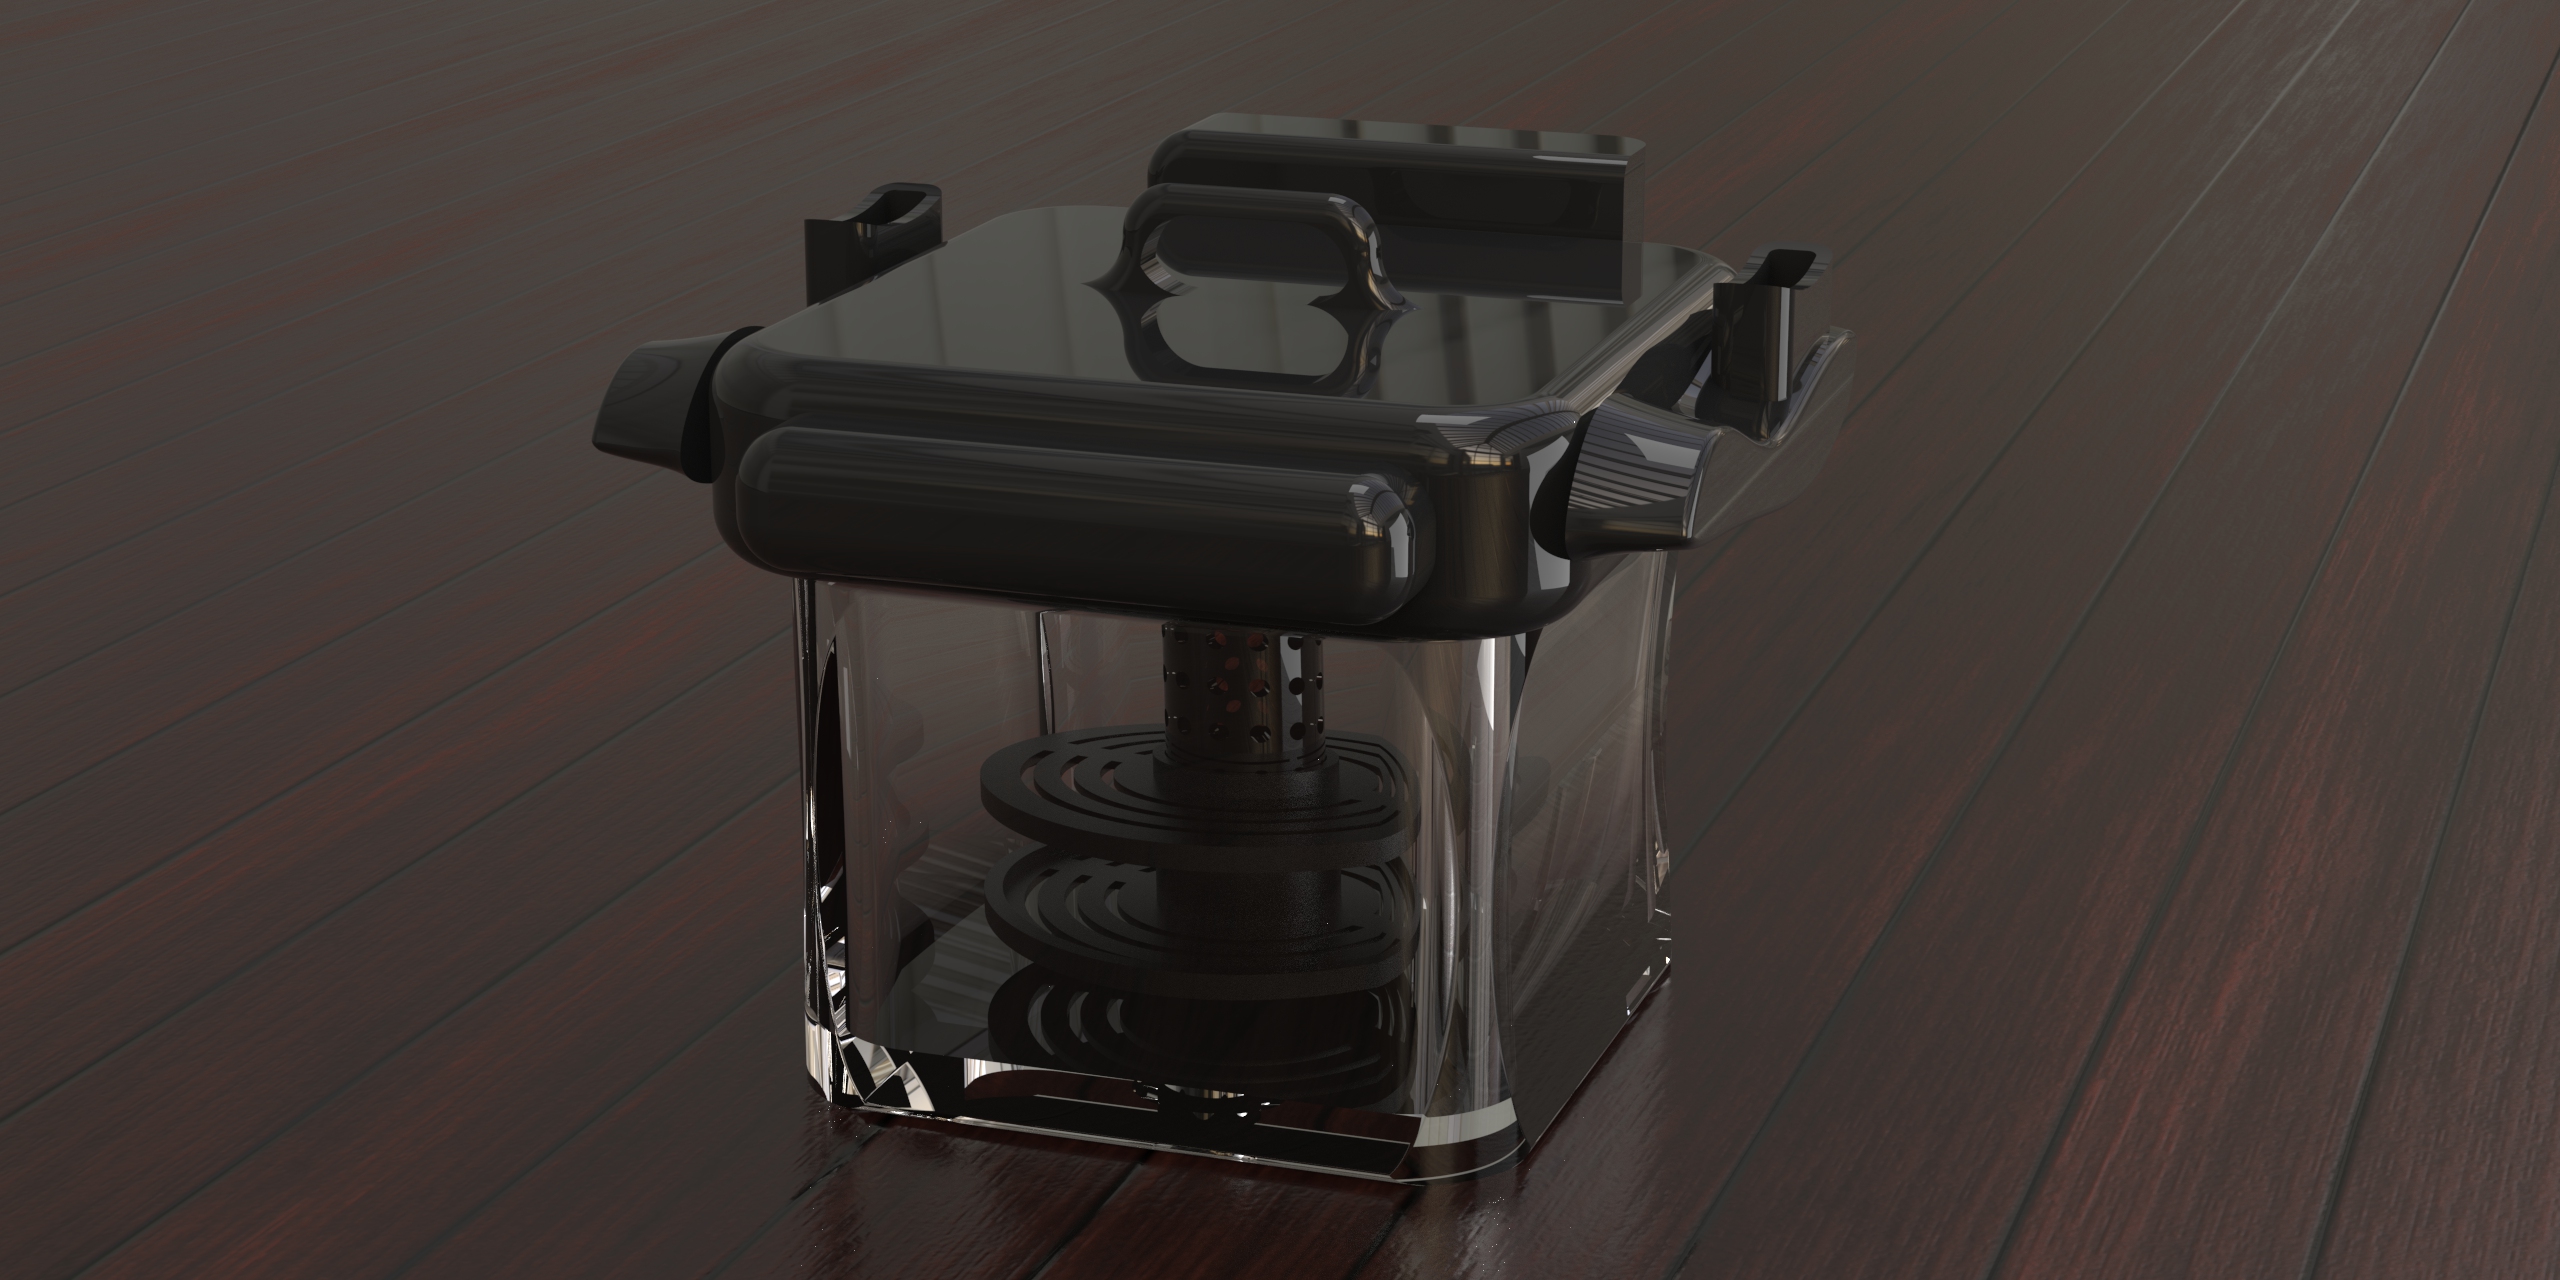
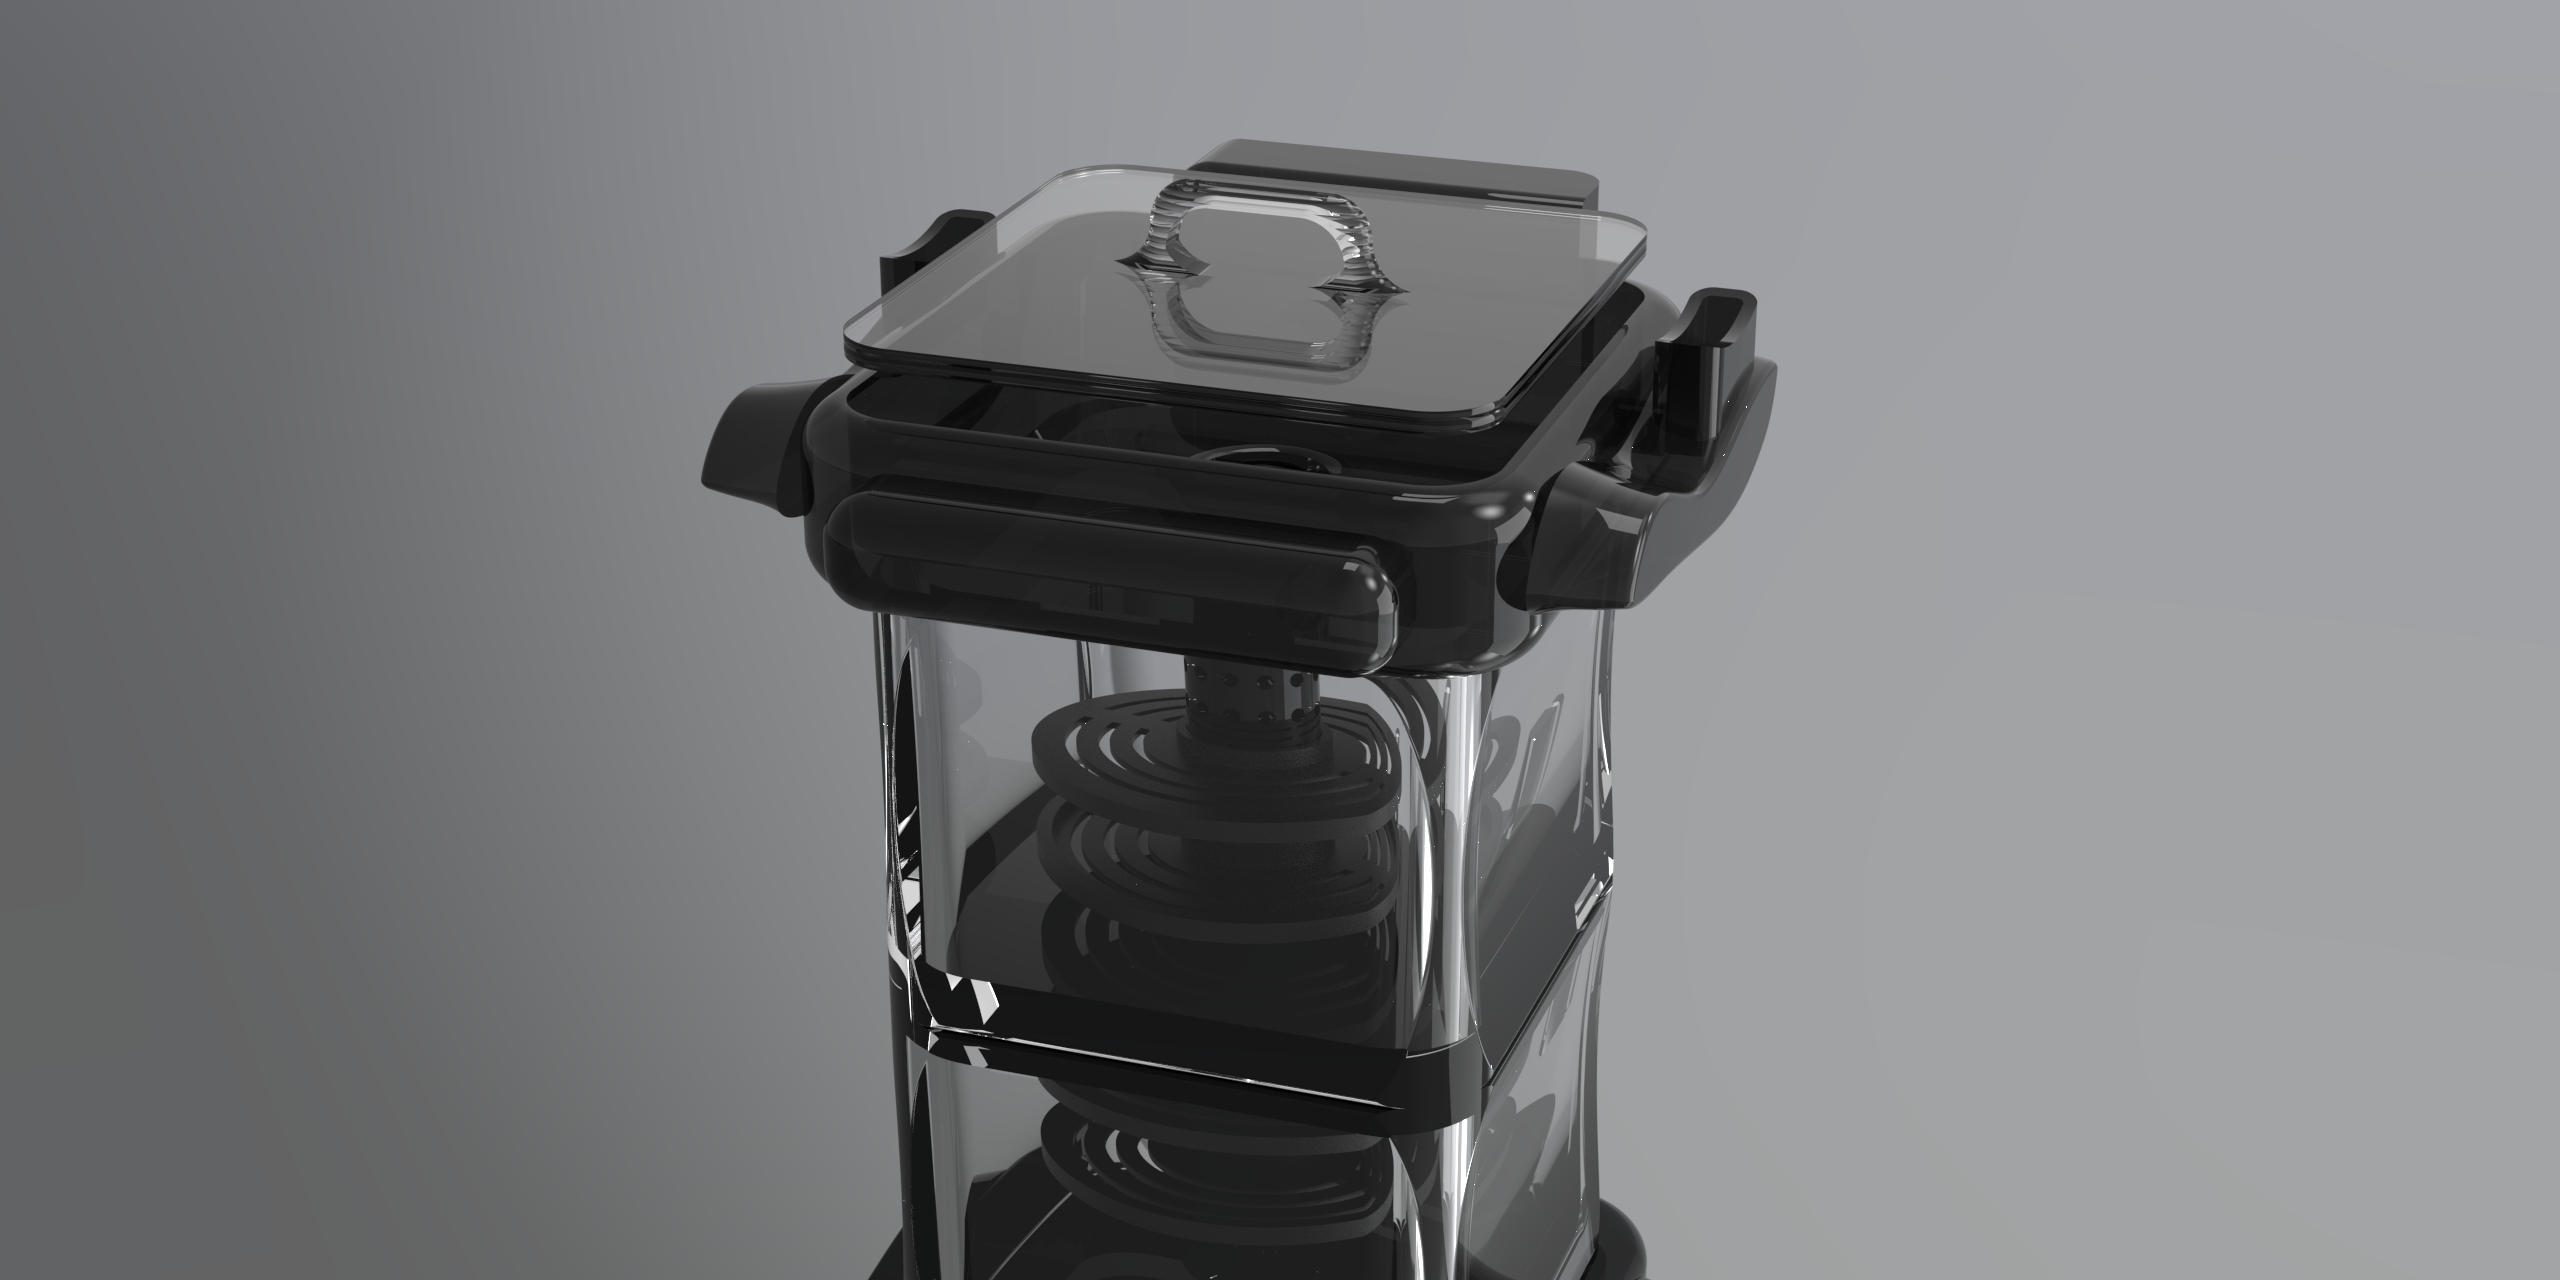
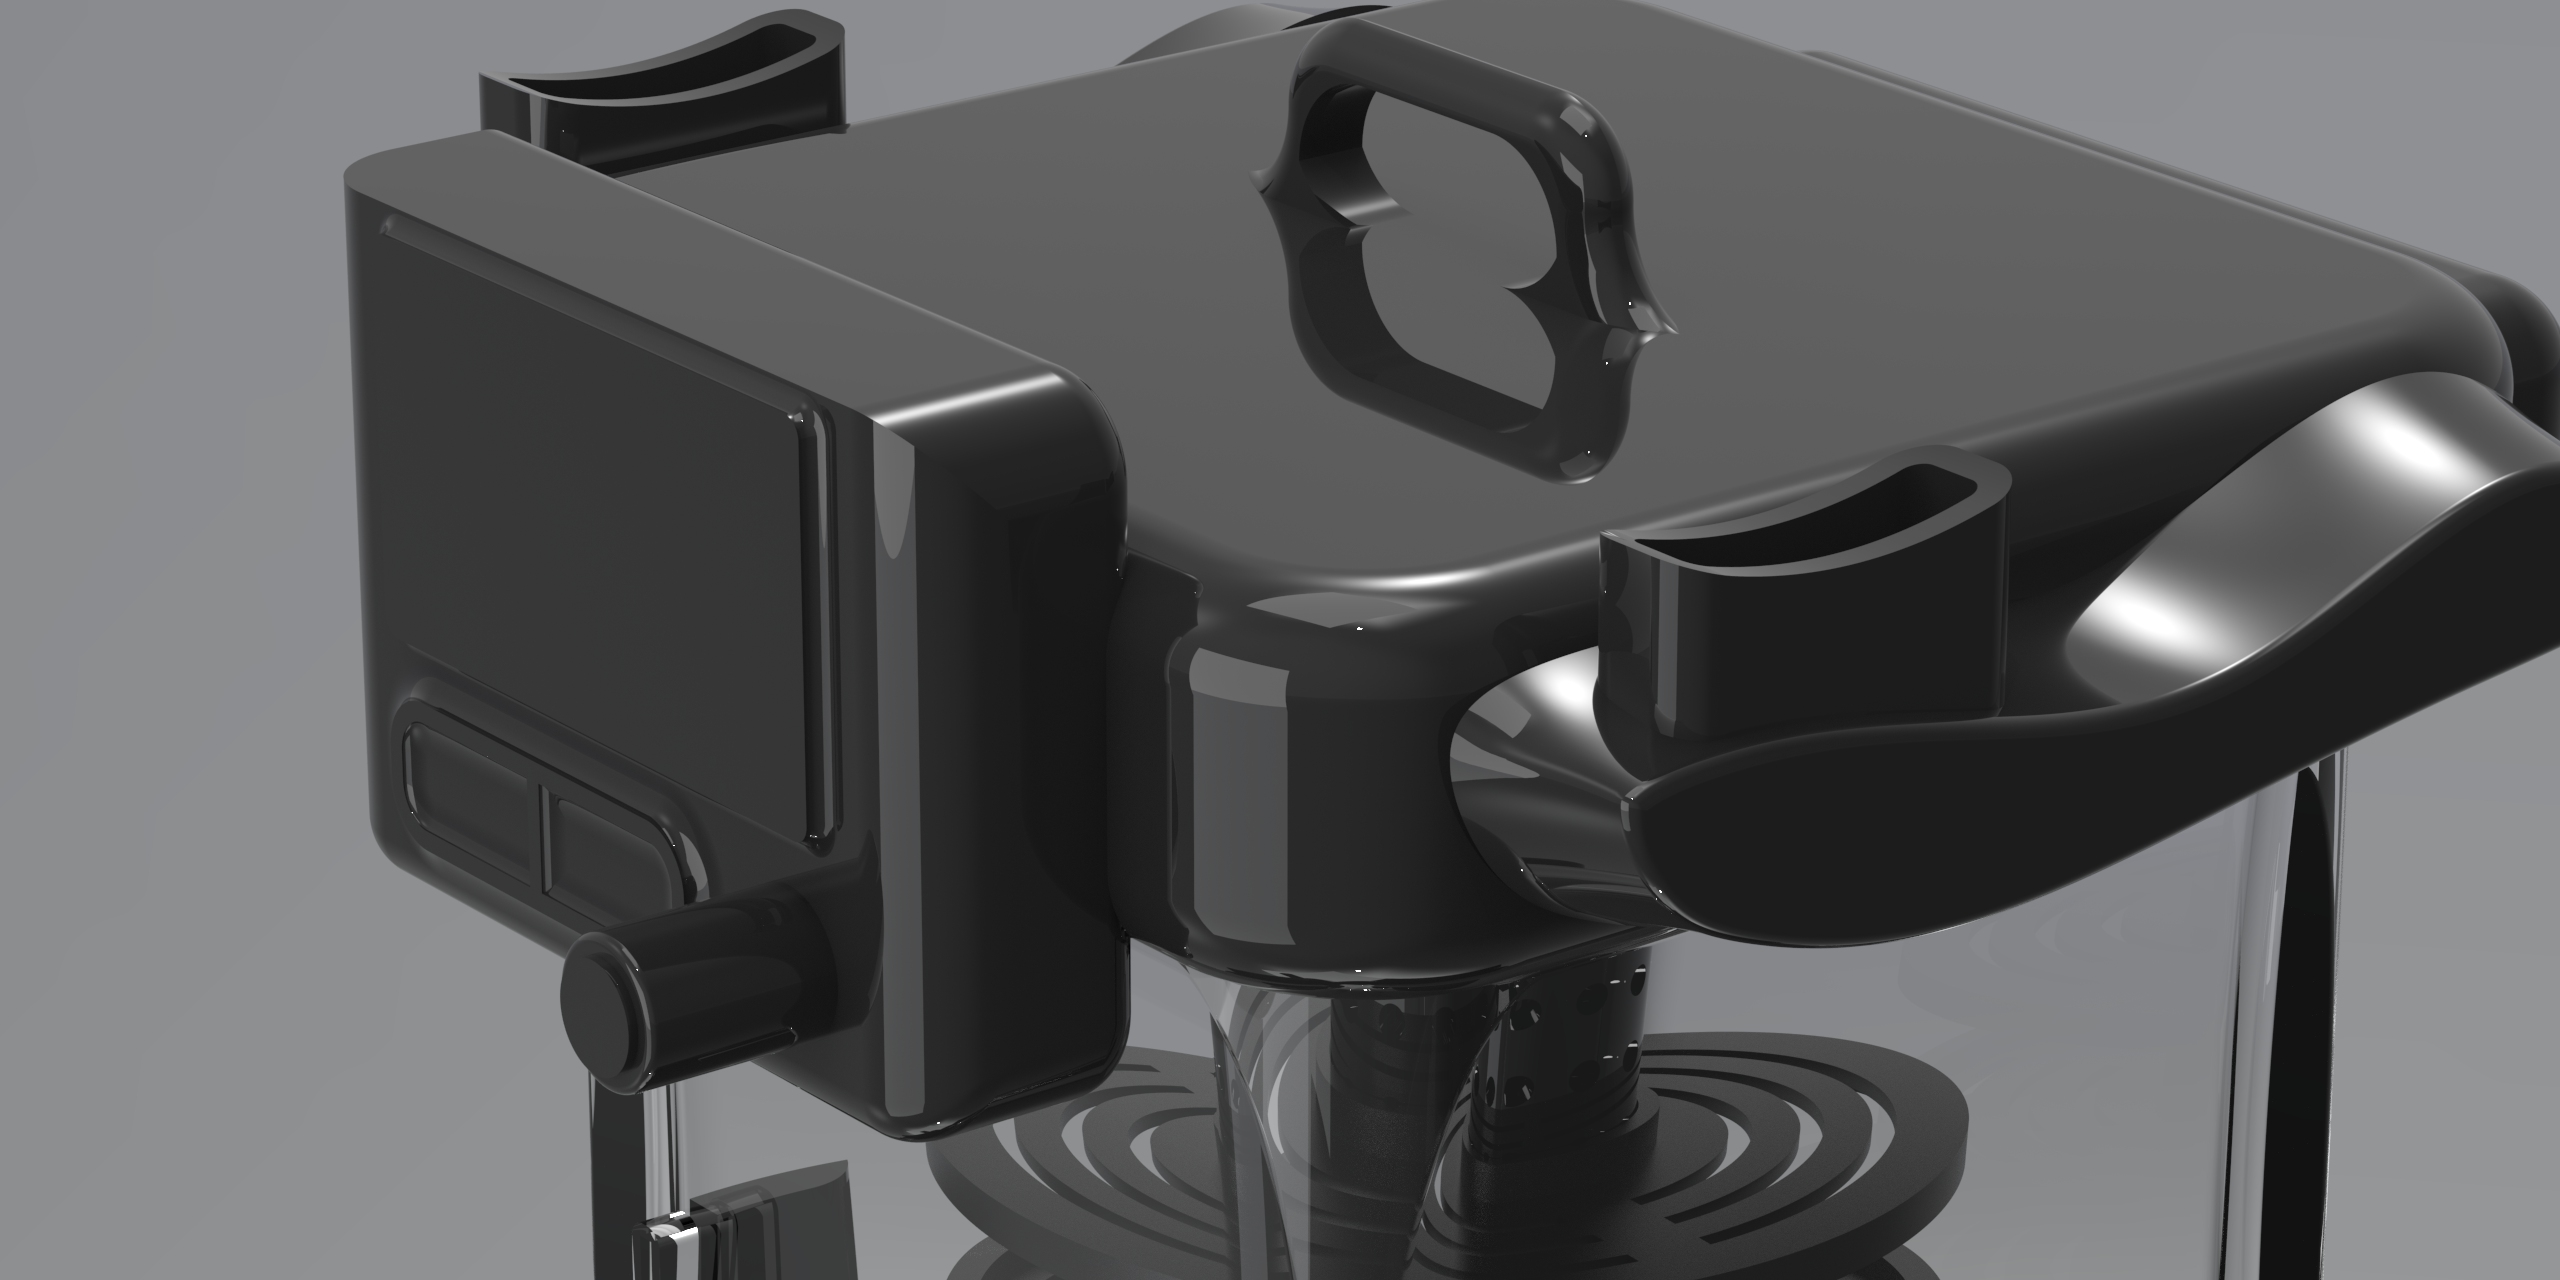
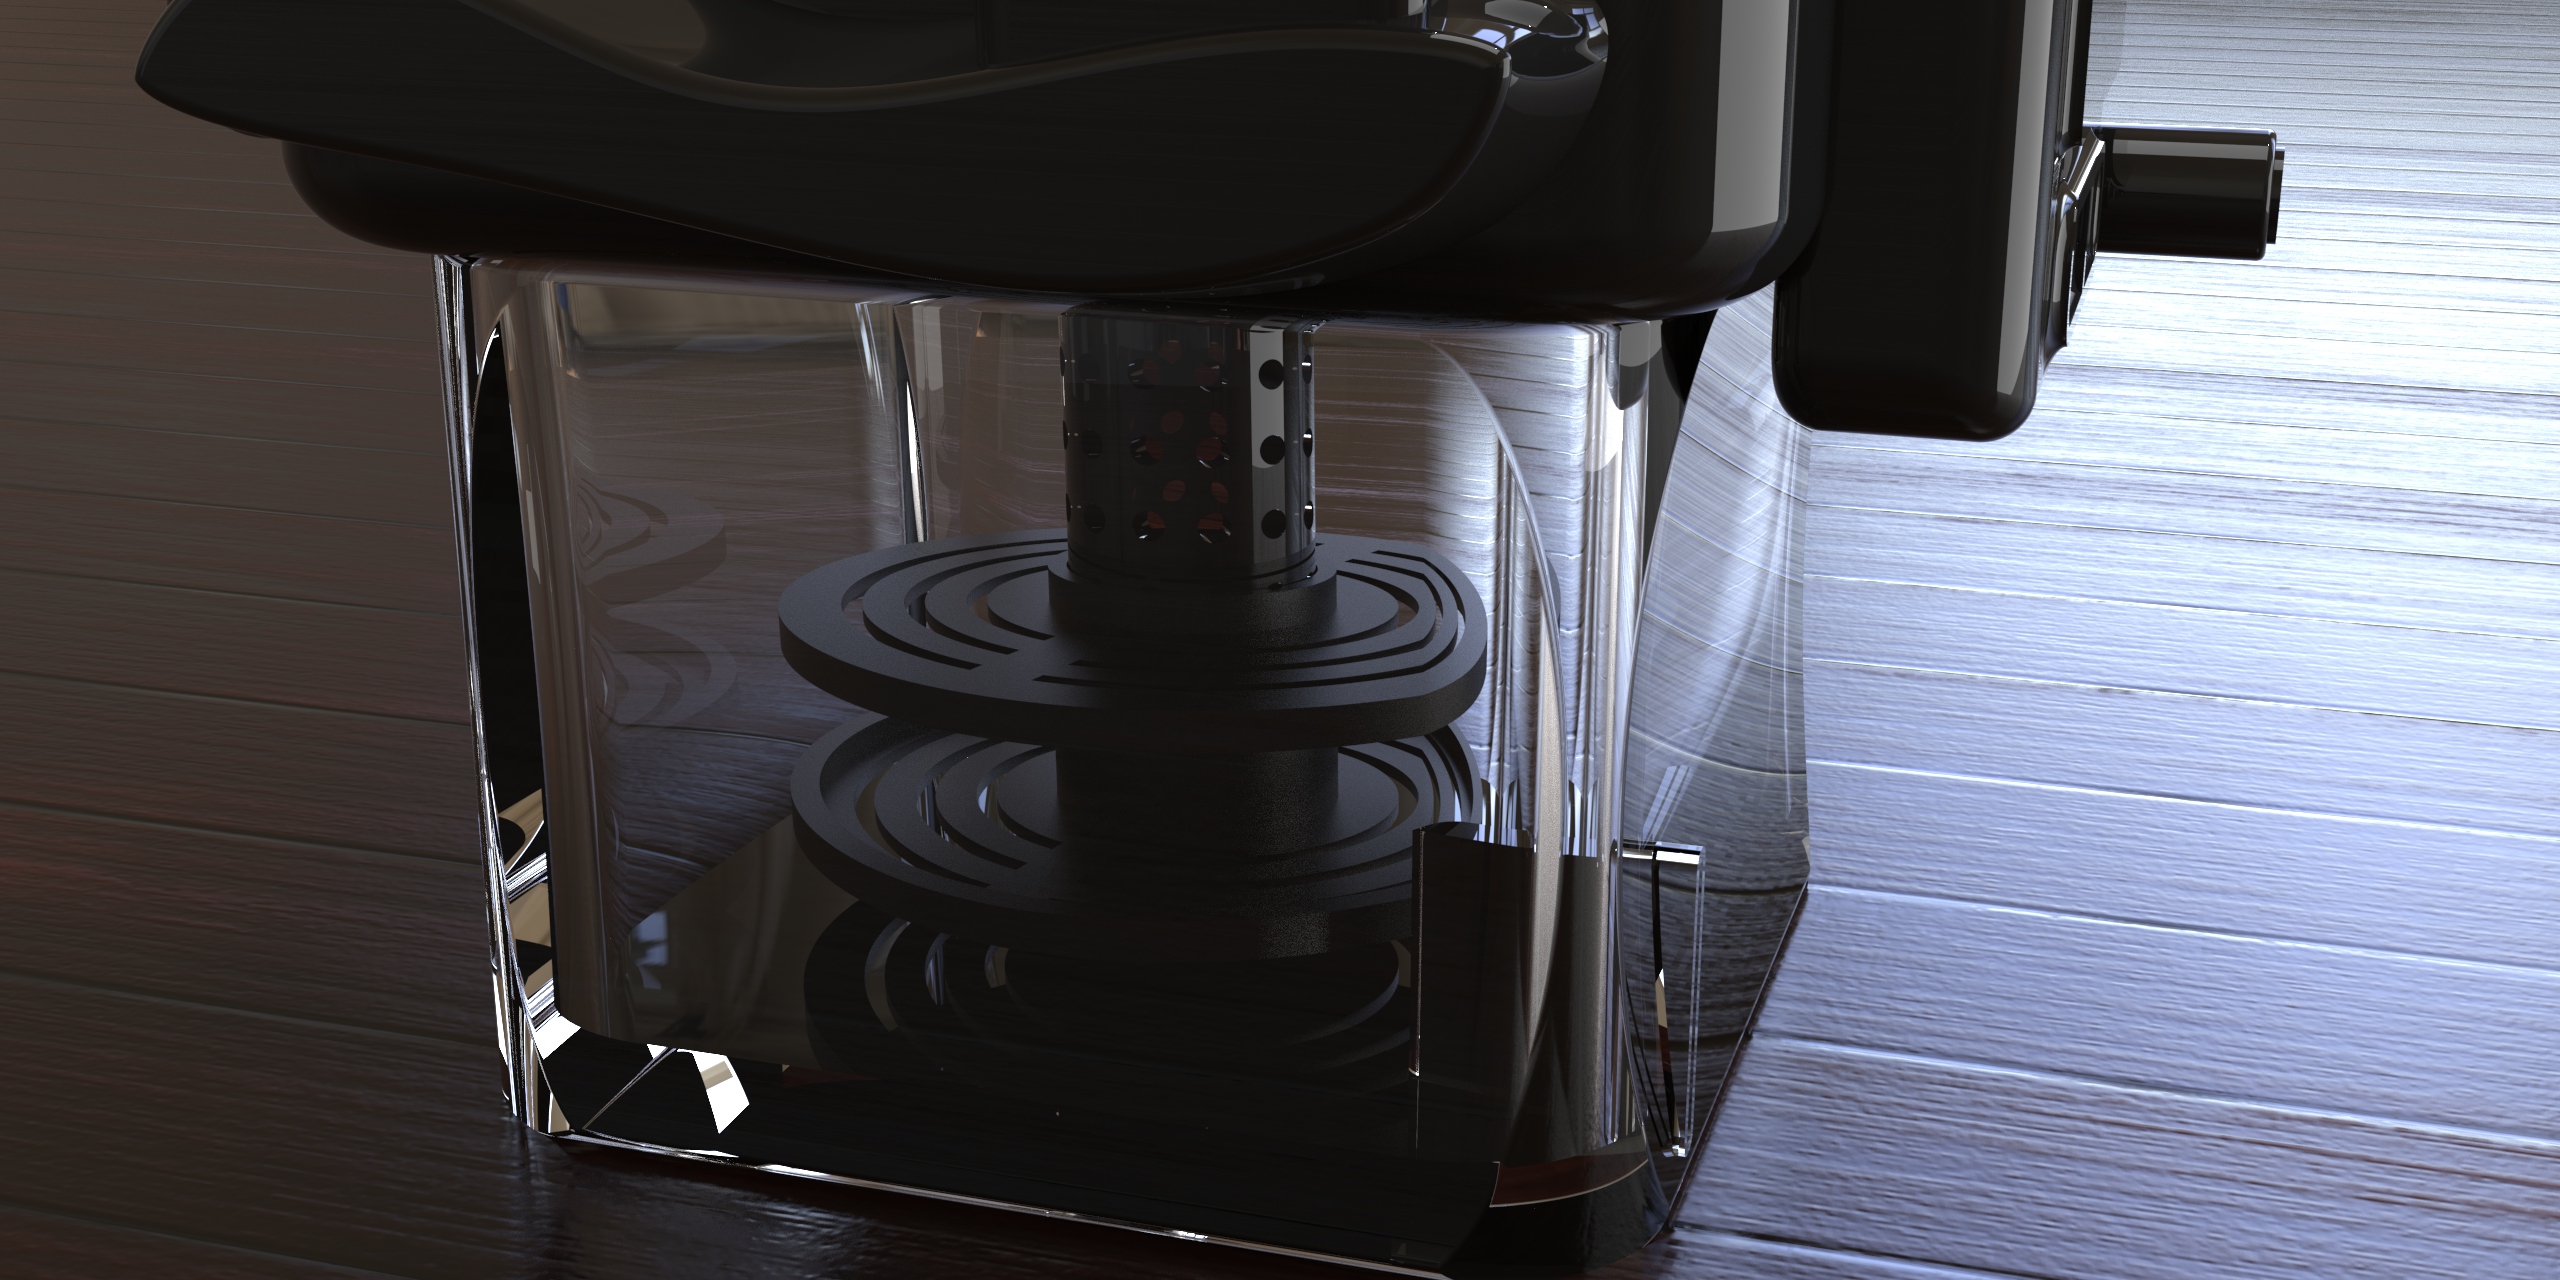
Auto Film Developer
A precision benchtop machine that brings darkroom-quality film development into the analog photographer's studio — no chemistry lab required.
2023 · Product Design
A precision benchtop machine that brings darkroom-quality film development into the analog photographer's studio — no chemistry lab required.
Overview
Film photography is experiencing a quiet renaissance — but developing negatives is still an intimidating, equipment-heavy process for anyone without access to a full wet darkroom. The Auto Film Developer condenses that ritual into a single, beautifully engineered countertop device.
The goal was to make film development feel as approachable as brewing coffee, without sacrificing the chemistry-level precision that analog photographers demand.
The Traditional Darkroom Process
The Rising Wave
Over the past five years, film photography has quietly shifted from a professional tool into a mainstream creative hobby. Millions of digital-native photographers are picking up their first roll — with zero darkroom knowledge and no idea where to start. That gap between curiosity and capability is exactly the problem this machine was designed to close.
Film interest index — Google Trends 2019–2024
New film photographers by age group
The Challenge
Film development is a discipline of seconds. Temperature drift of half a degree, agitation timing off by three seconds — either one can ruin a roll. The device had to hold tolerances that most consumer products never contemplate, in a footprint that could actually live on a desk.
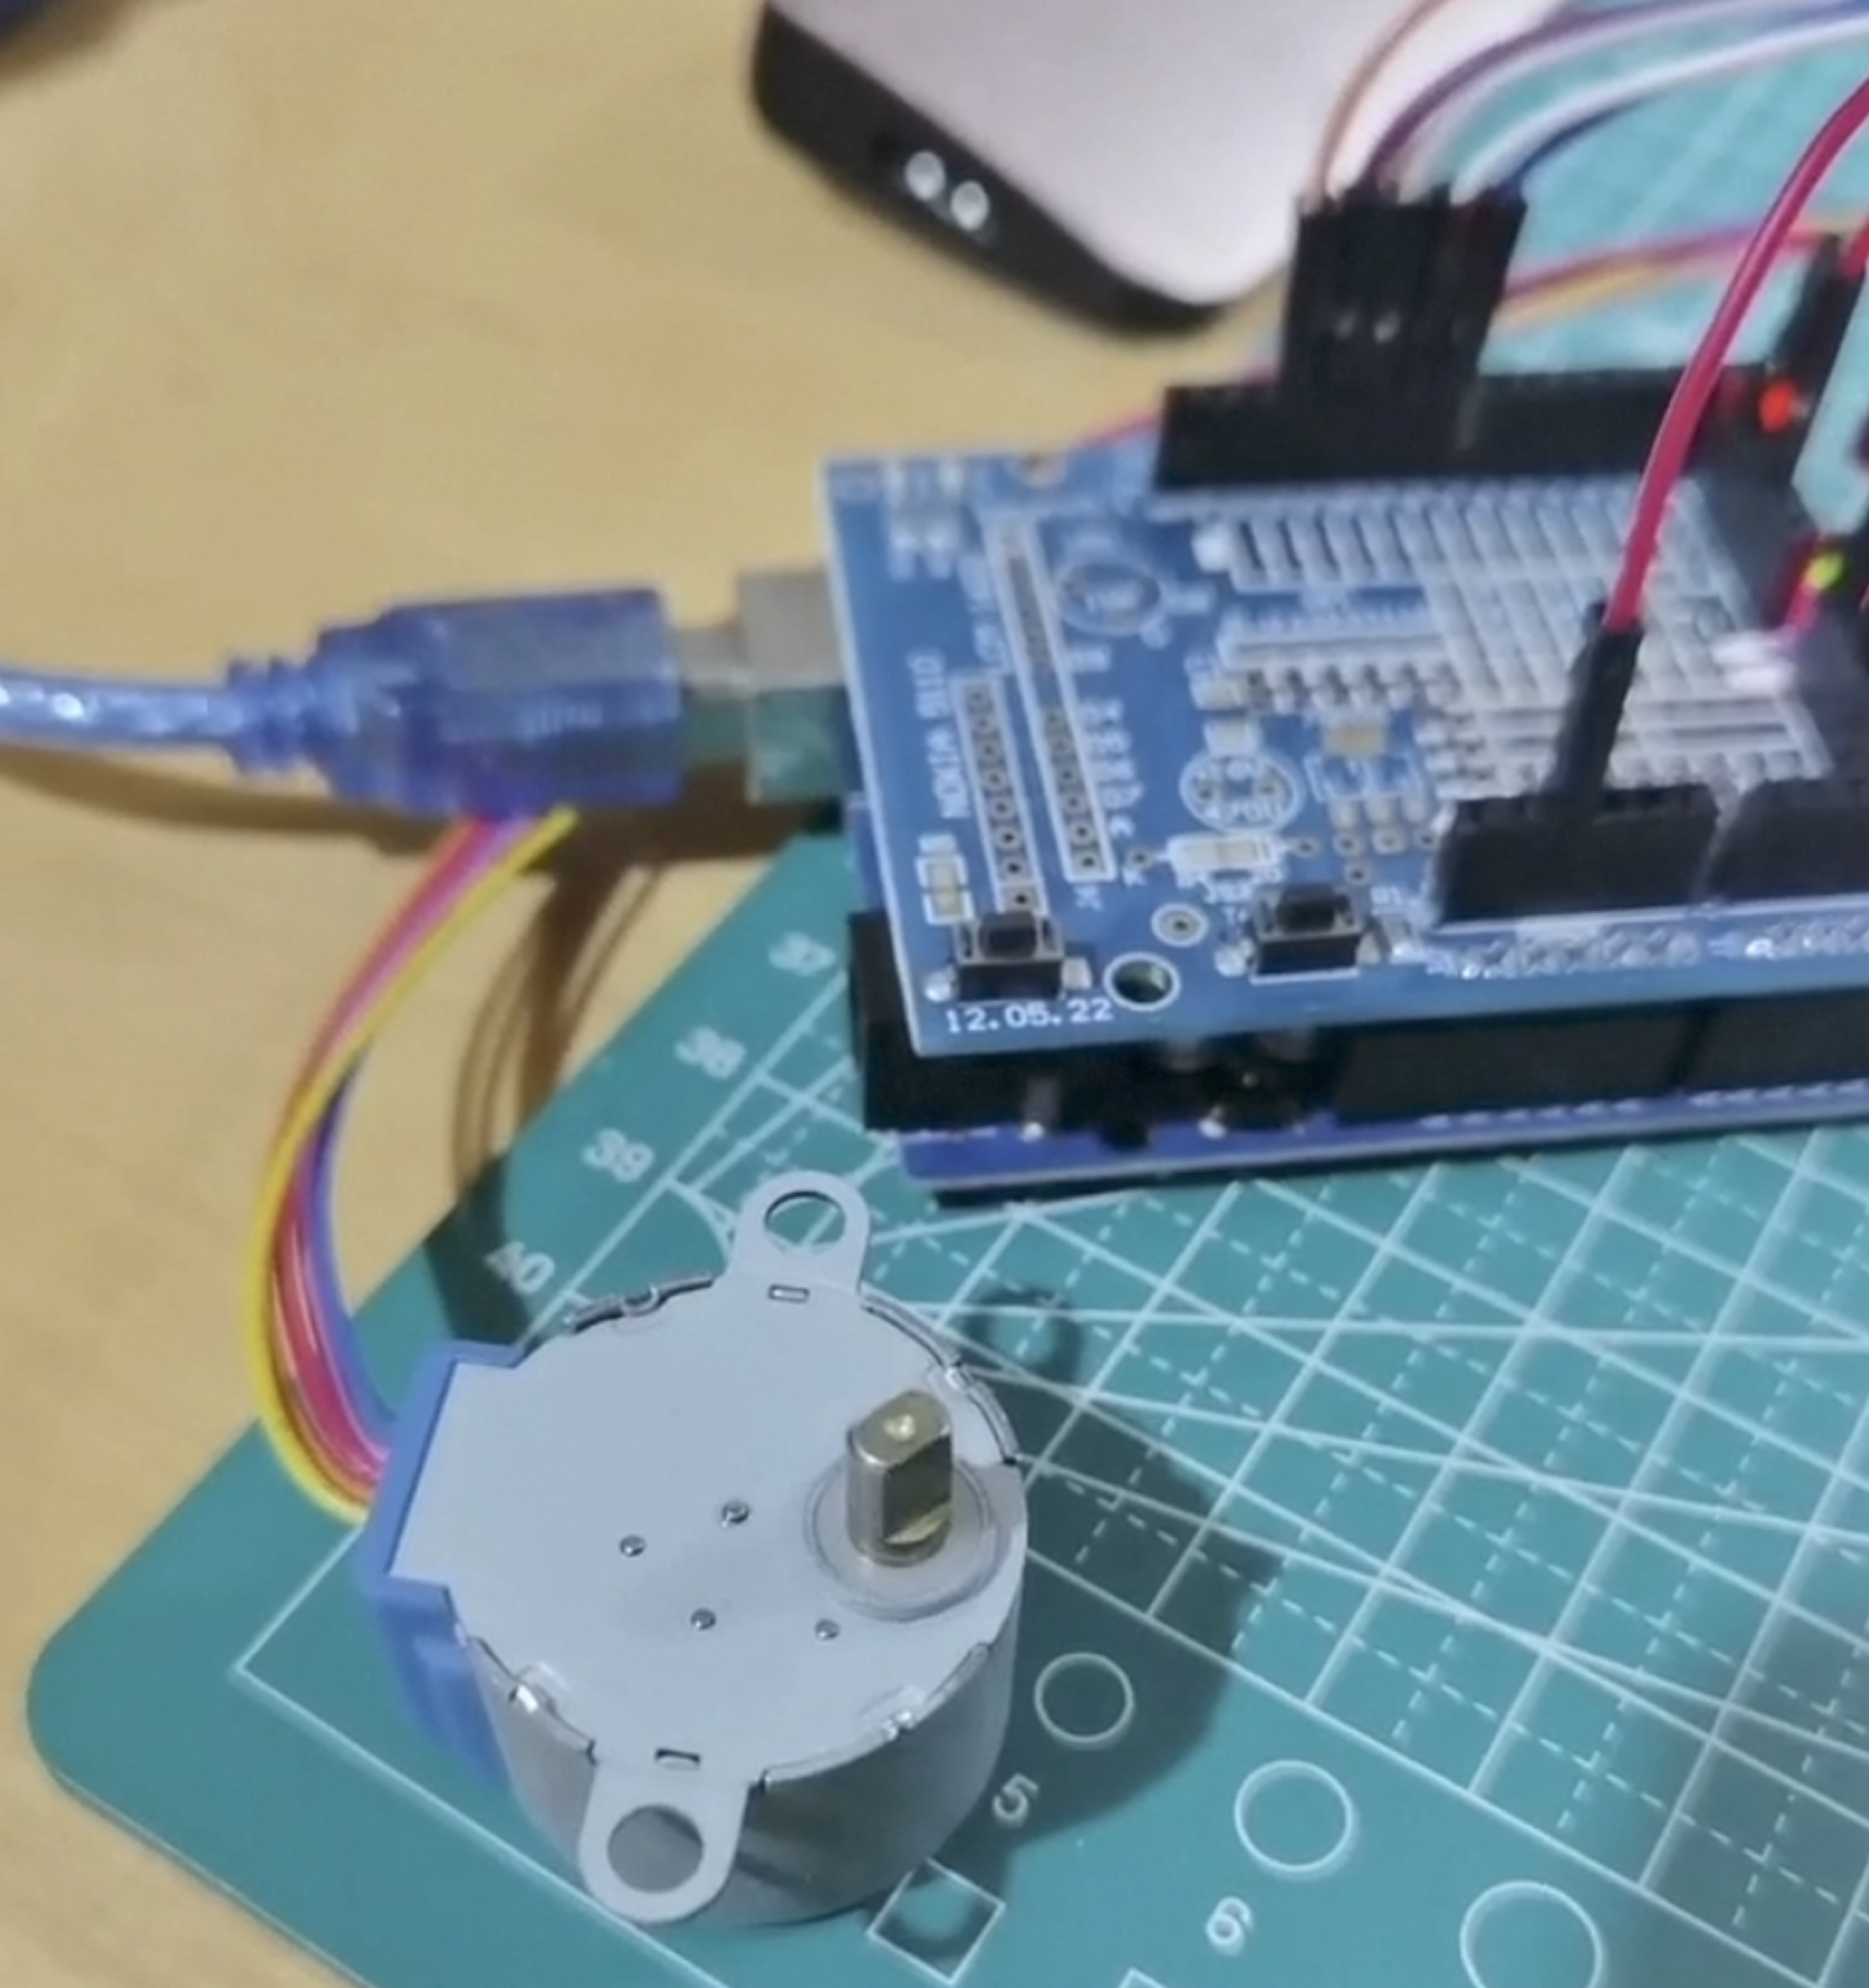
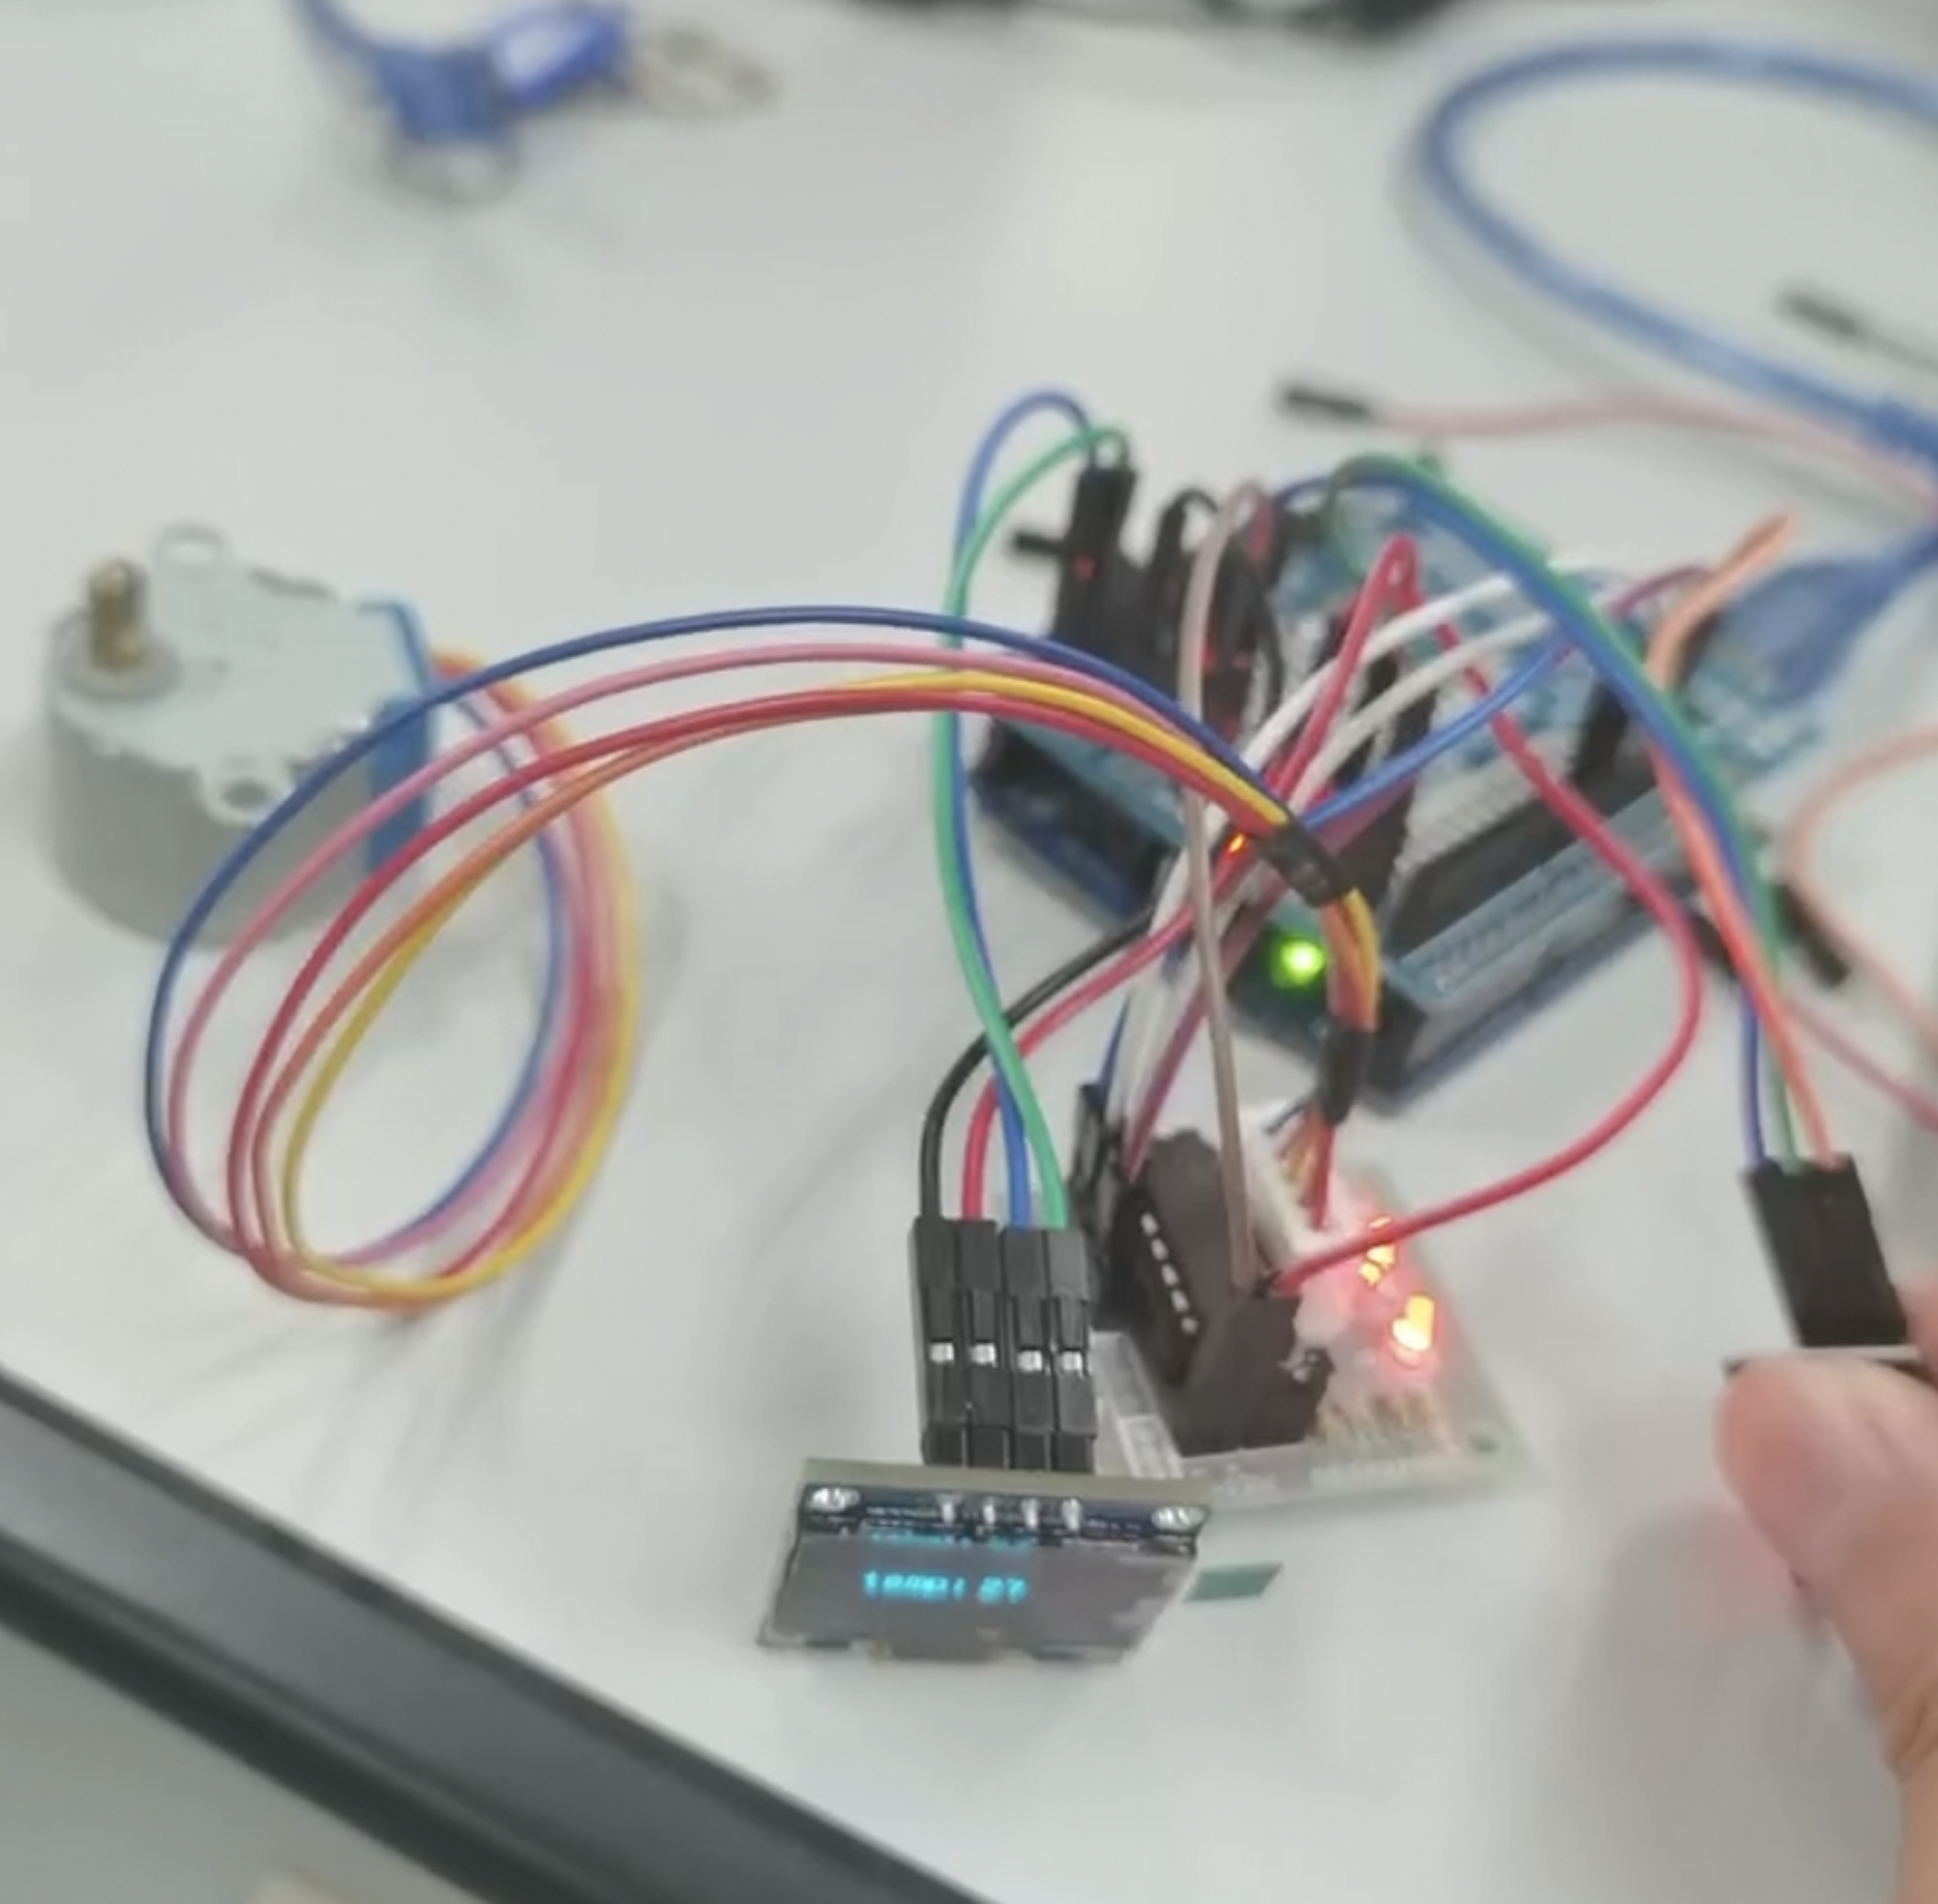
I worked through the mechanical architecture, thermal management, user interaction, and the physical language of the product in parallel.
Research
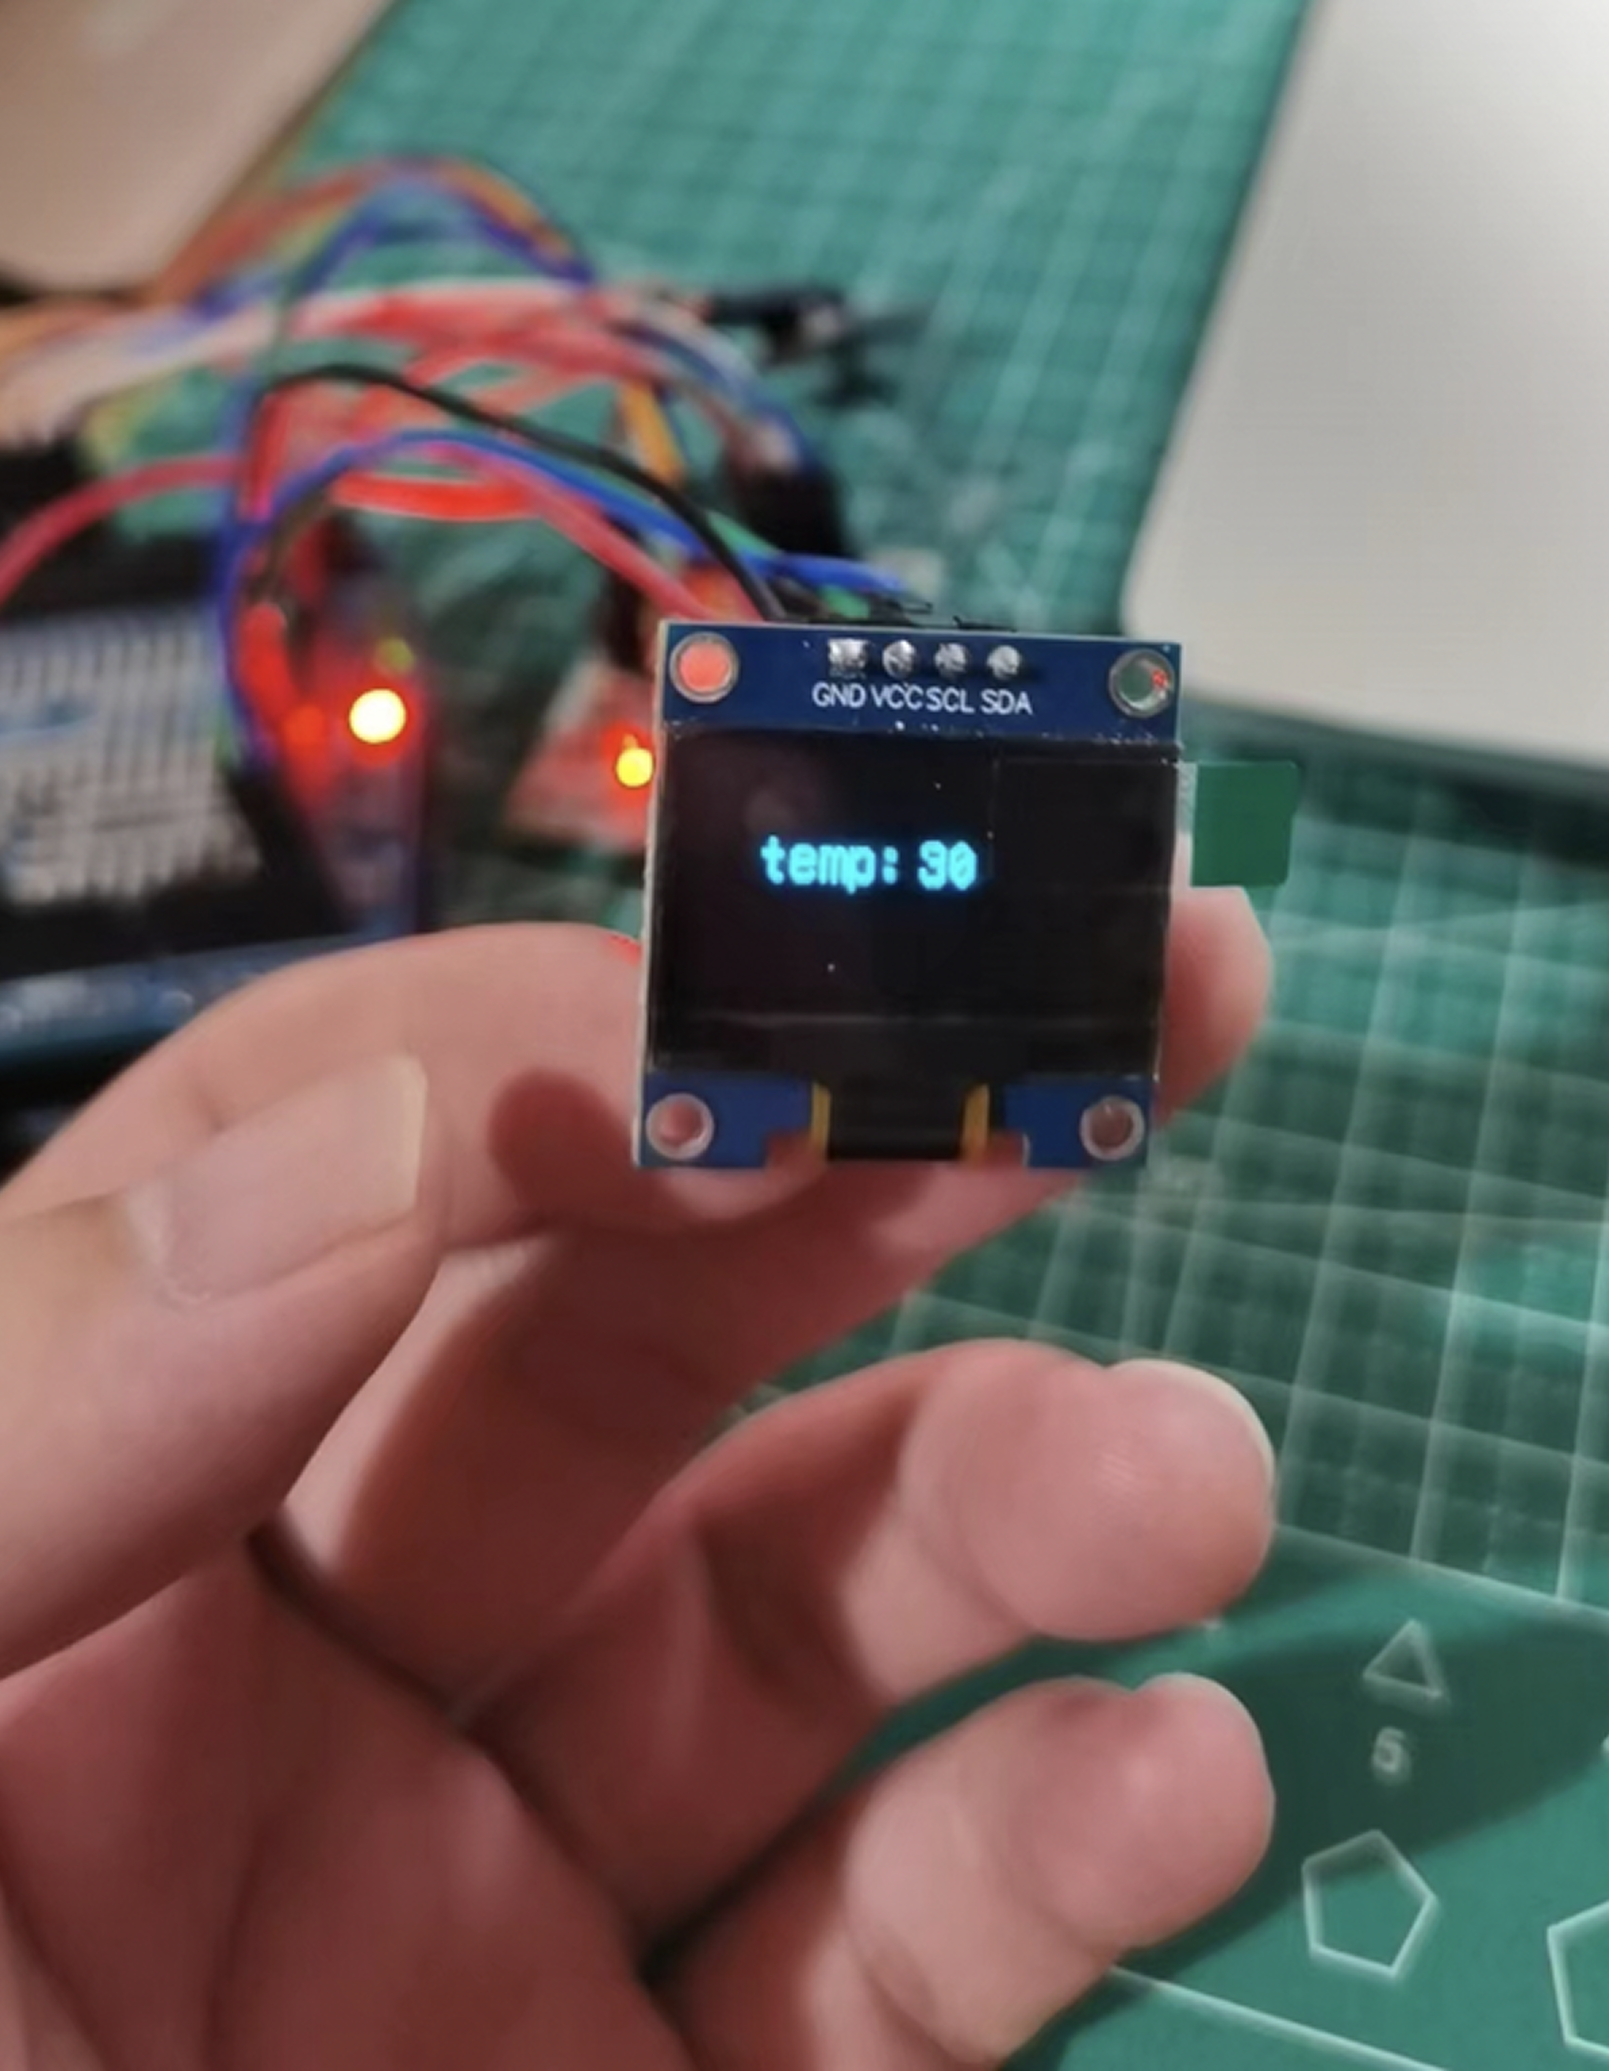
Before designing the control system, I mapped exactly how time and temperature degrade a negative — the two variables hobbyist photographers most consistently get wrong.

Develop times vary by film stock — at 68°F, D-76

Each film stock also has its own ideal develop time — adding a third variable the photographer must track entirely by hand.
Current Solutions
Film development tools split into two extremes — manual tanks under $50 that demand constant attention, or fully automated machines costing $10,000. I spoke with film hobbyists to understand where the market was failing them.
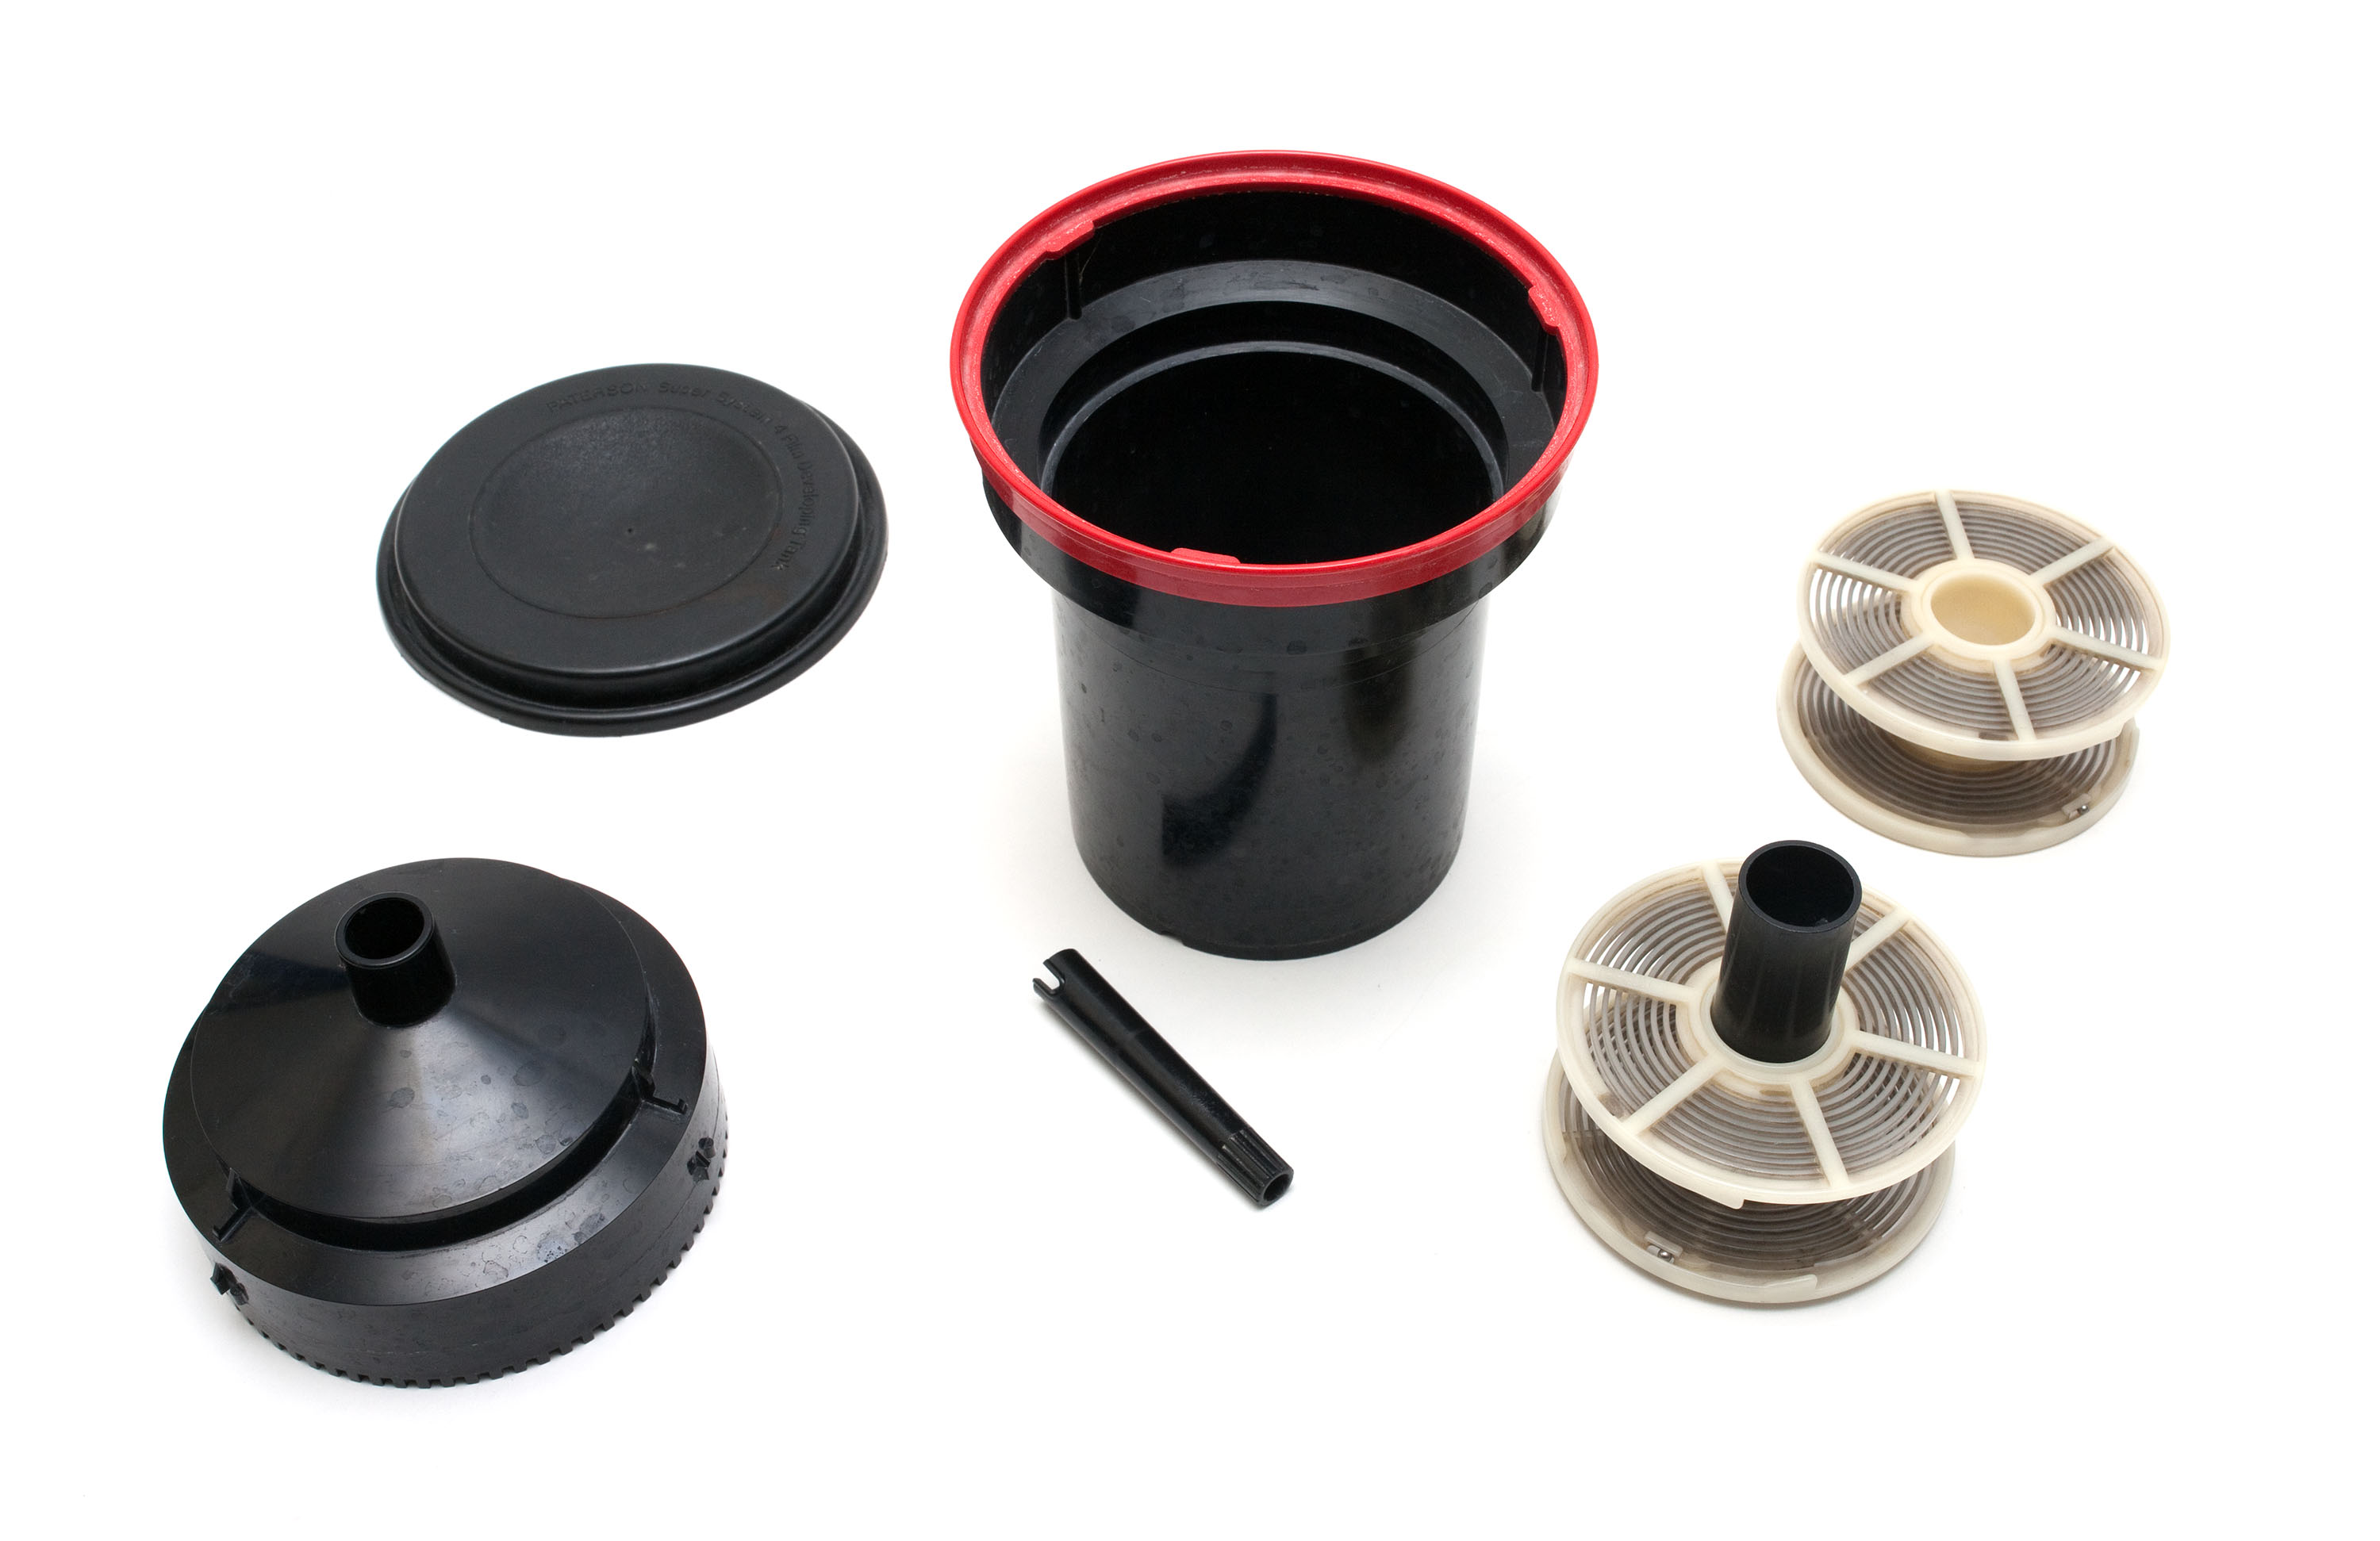
Simple to operate, widely available, fairly durable
Fully manual — every step must be timed and monitored by hand

Motorized agitation reduces physical effort during development
Temperature and timing remain fully manual — user still monitors every step

Fully automated — temperature, timing, and agitation handled with lab-grade precision
Industrial pricing makes it impossible for everyday hobbyists to own
Automatic film development exists — but at $10,000, it belongs in labs, not studios. No one has built the middle ground: a precise, automated machine at a price a hobbyist can actually reach. That's the product.
Design Statement
I would like to design a film-developing device that can develop film smartly — enabling presets through a mobile app and developing film automatically, without the photographer needing to manage a single variable by hand.
Process
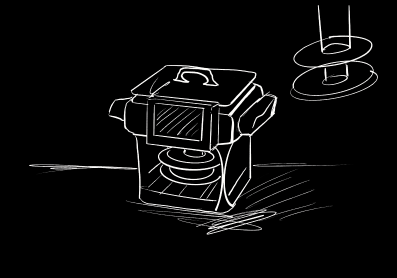
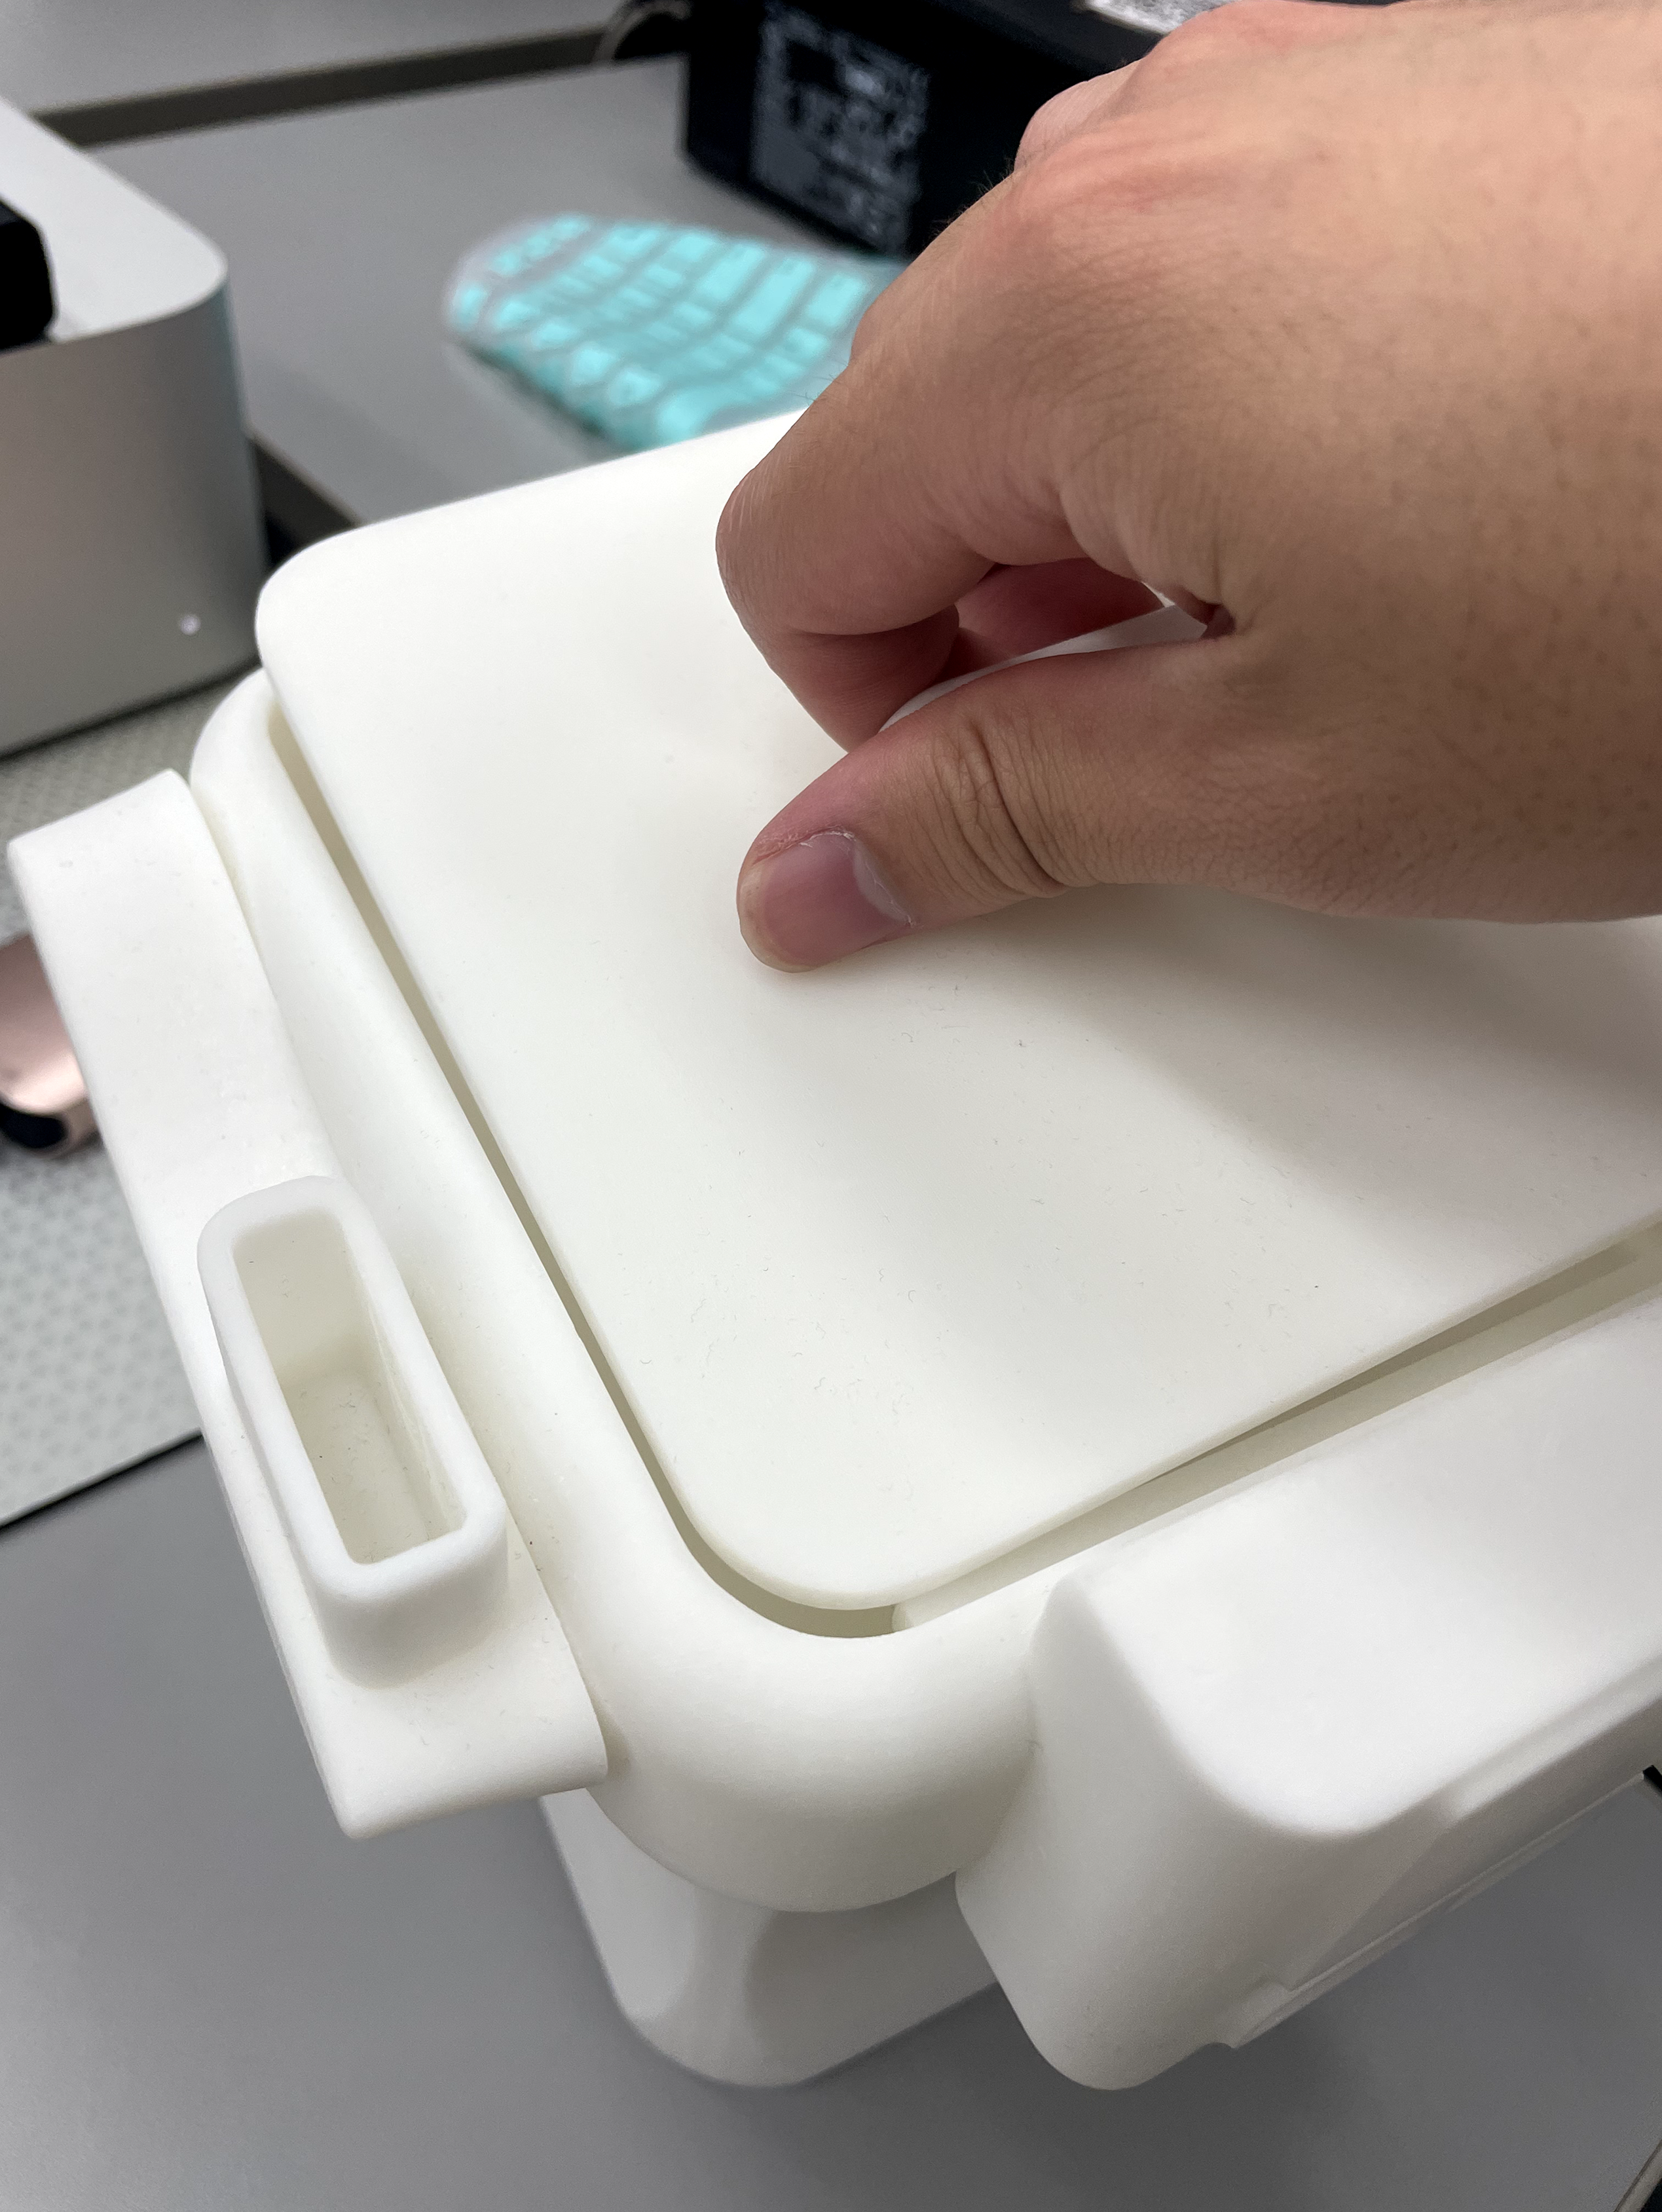
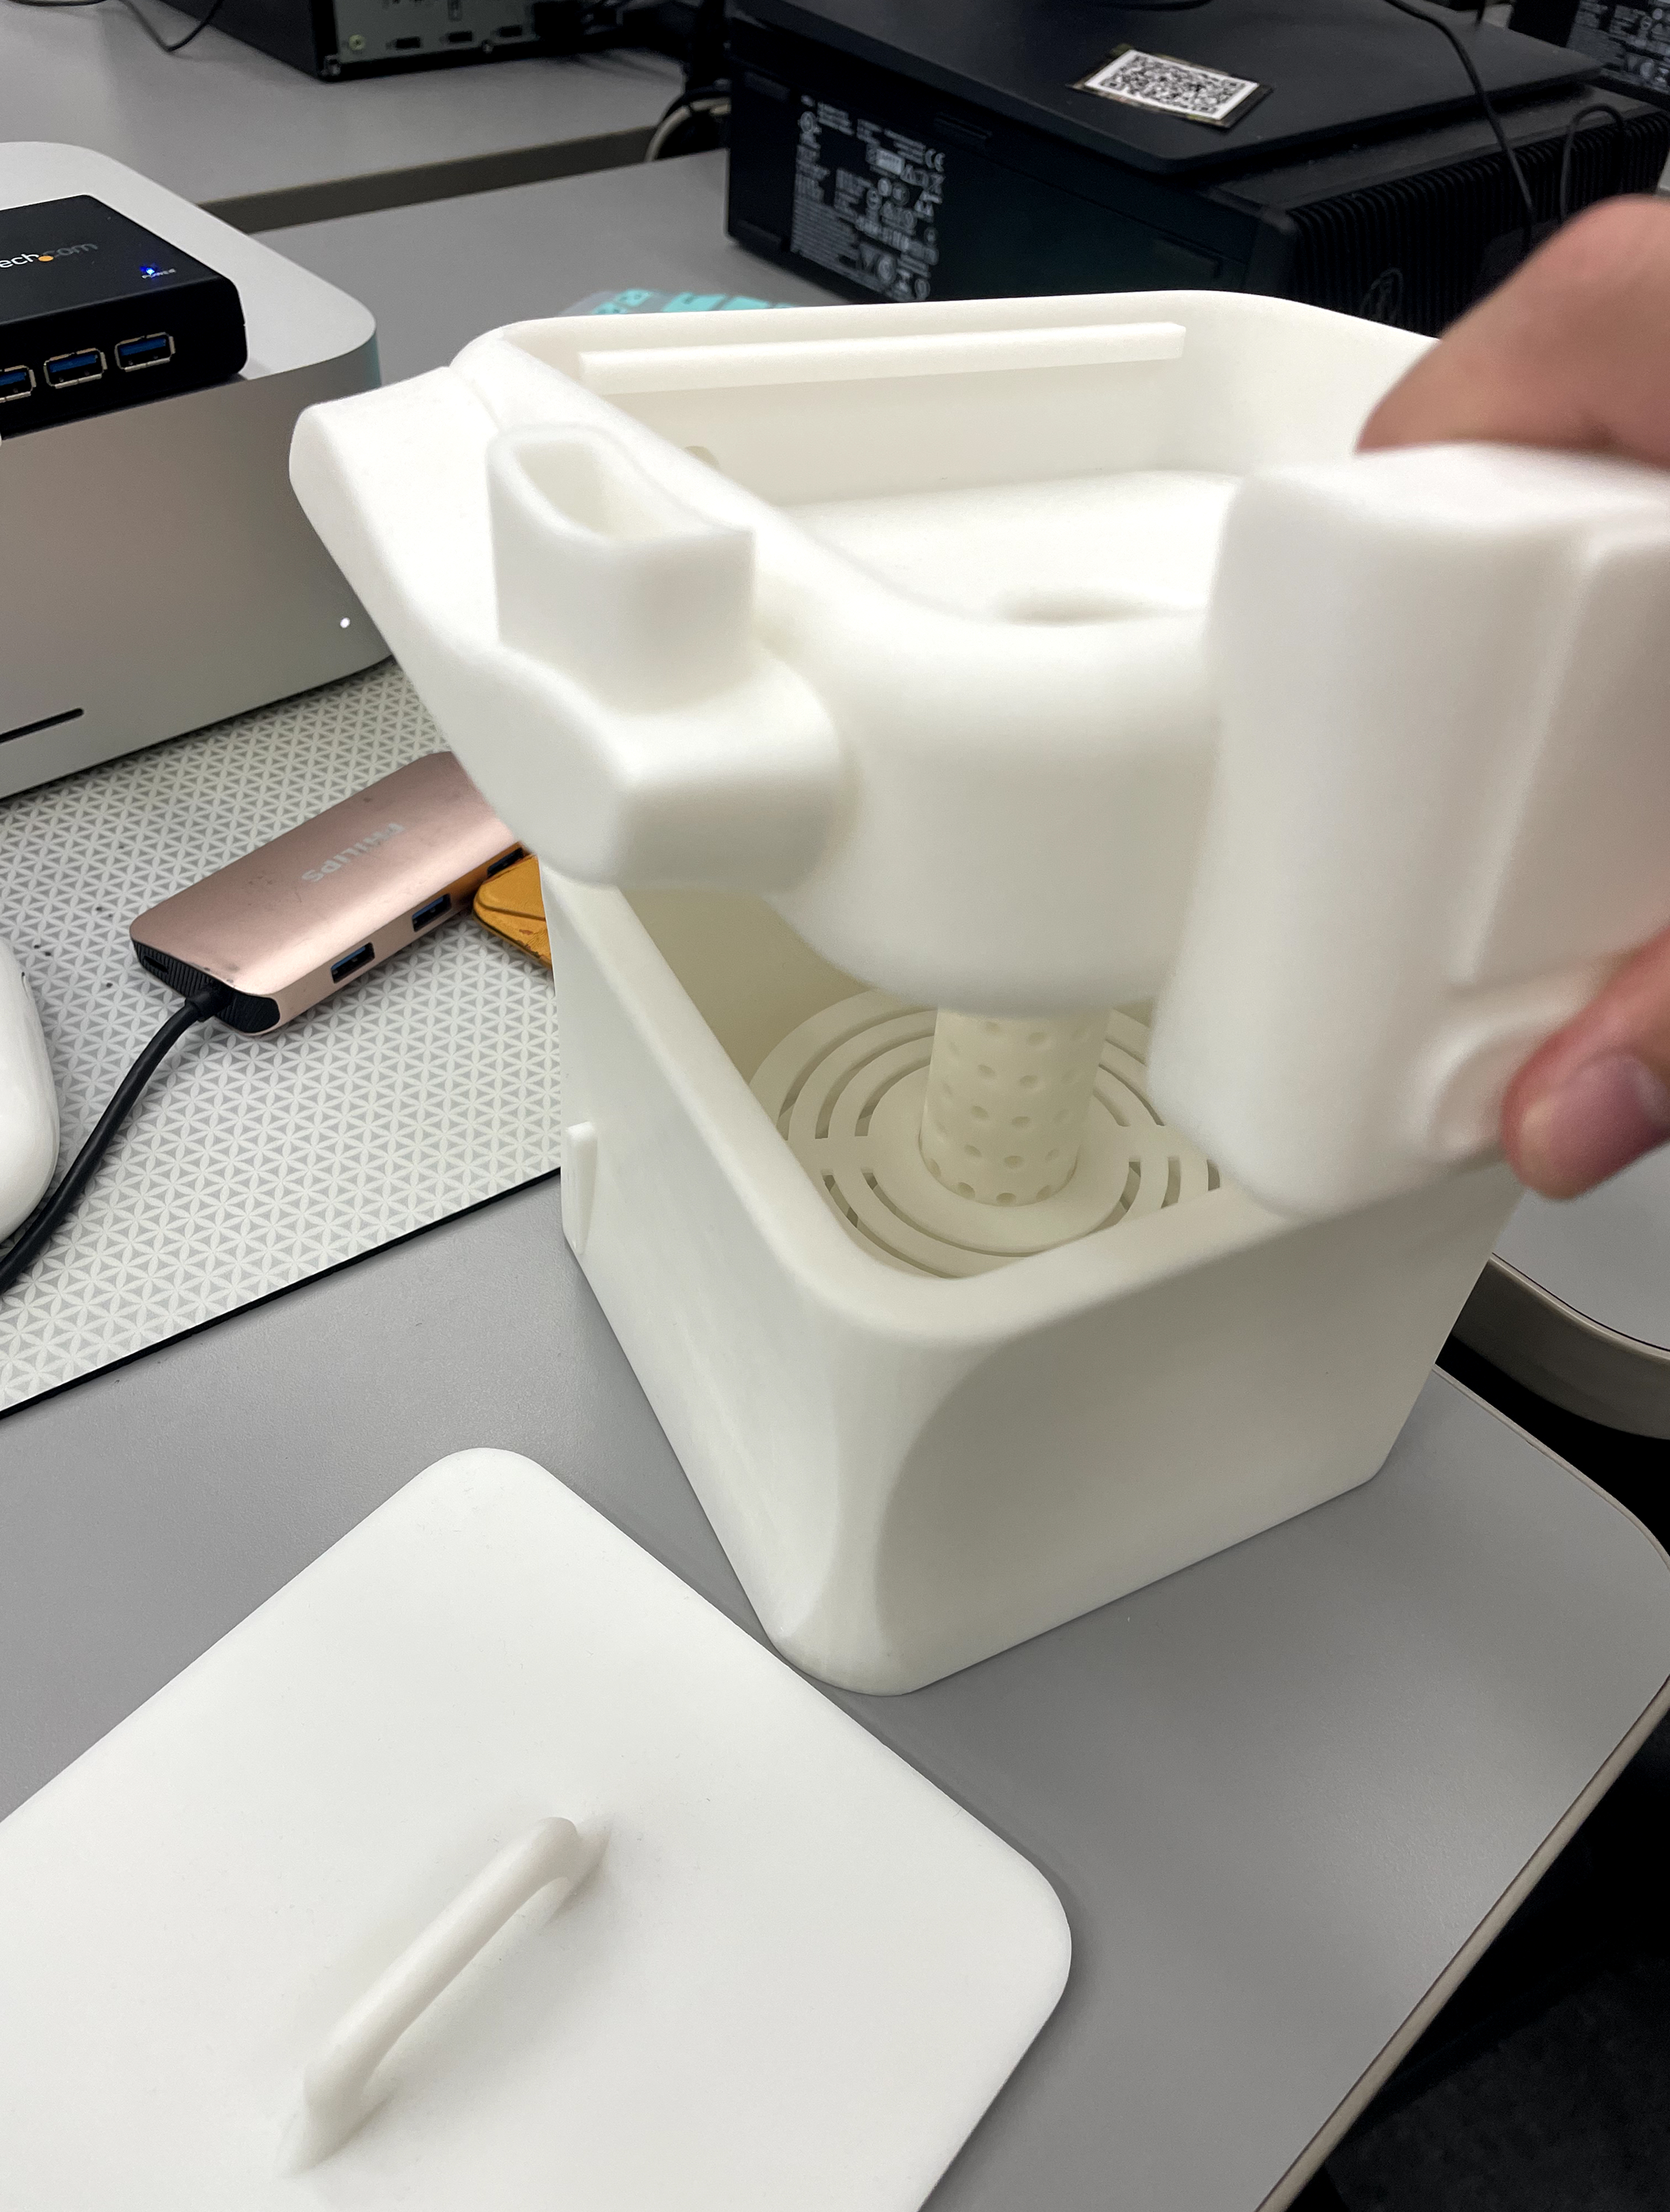
The project opened with analog sketching — working through form, component layout, and the physical language of the device before touching CAD. Key questions in the sketch phase: where does the film go in, how does the chemistry flow, and how does the lid communicate trust to someone who has never used a machine like this before?
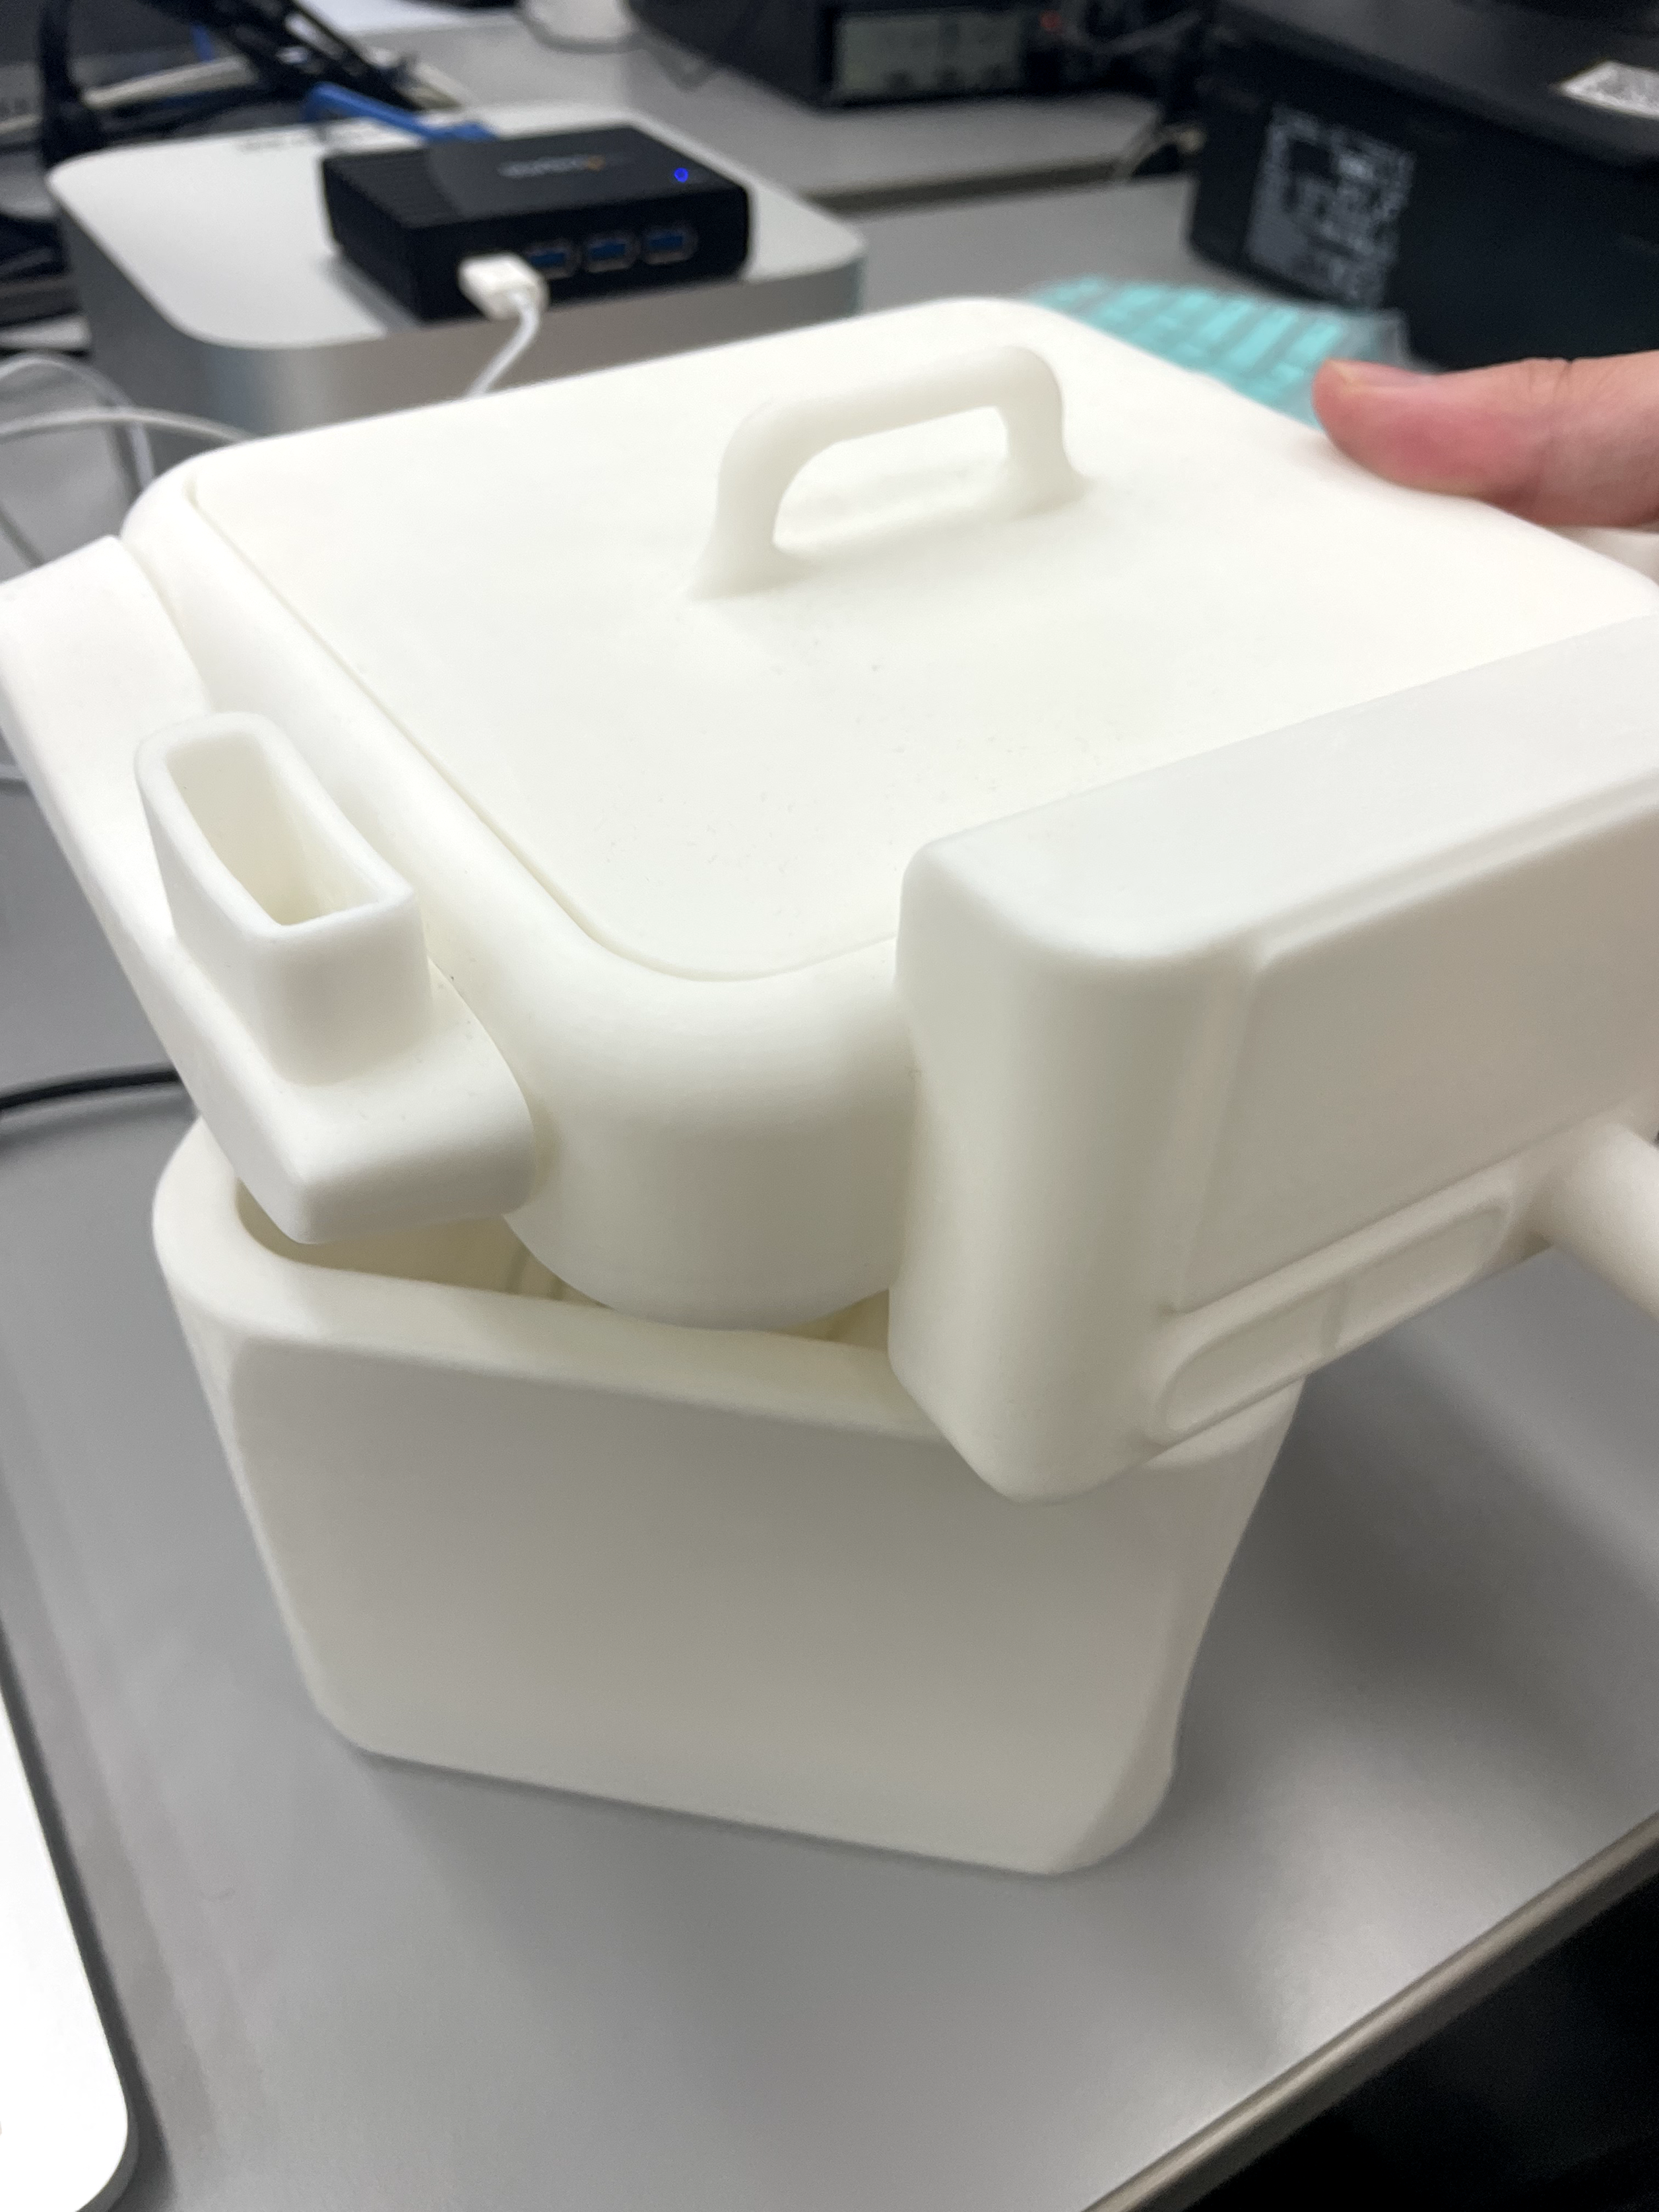
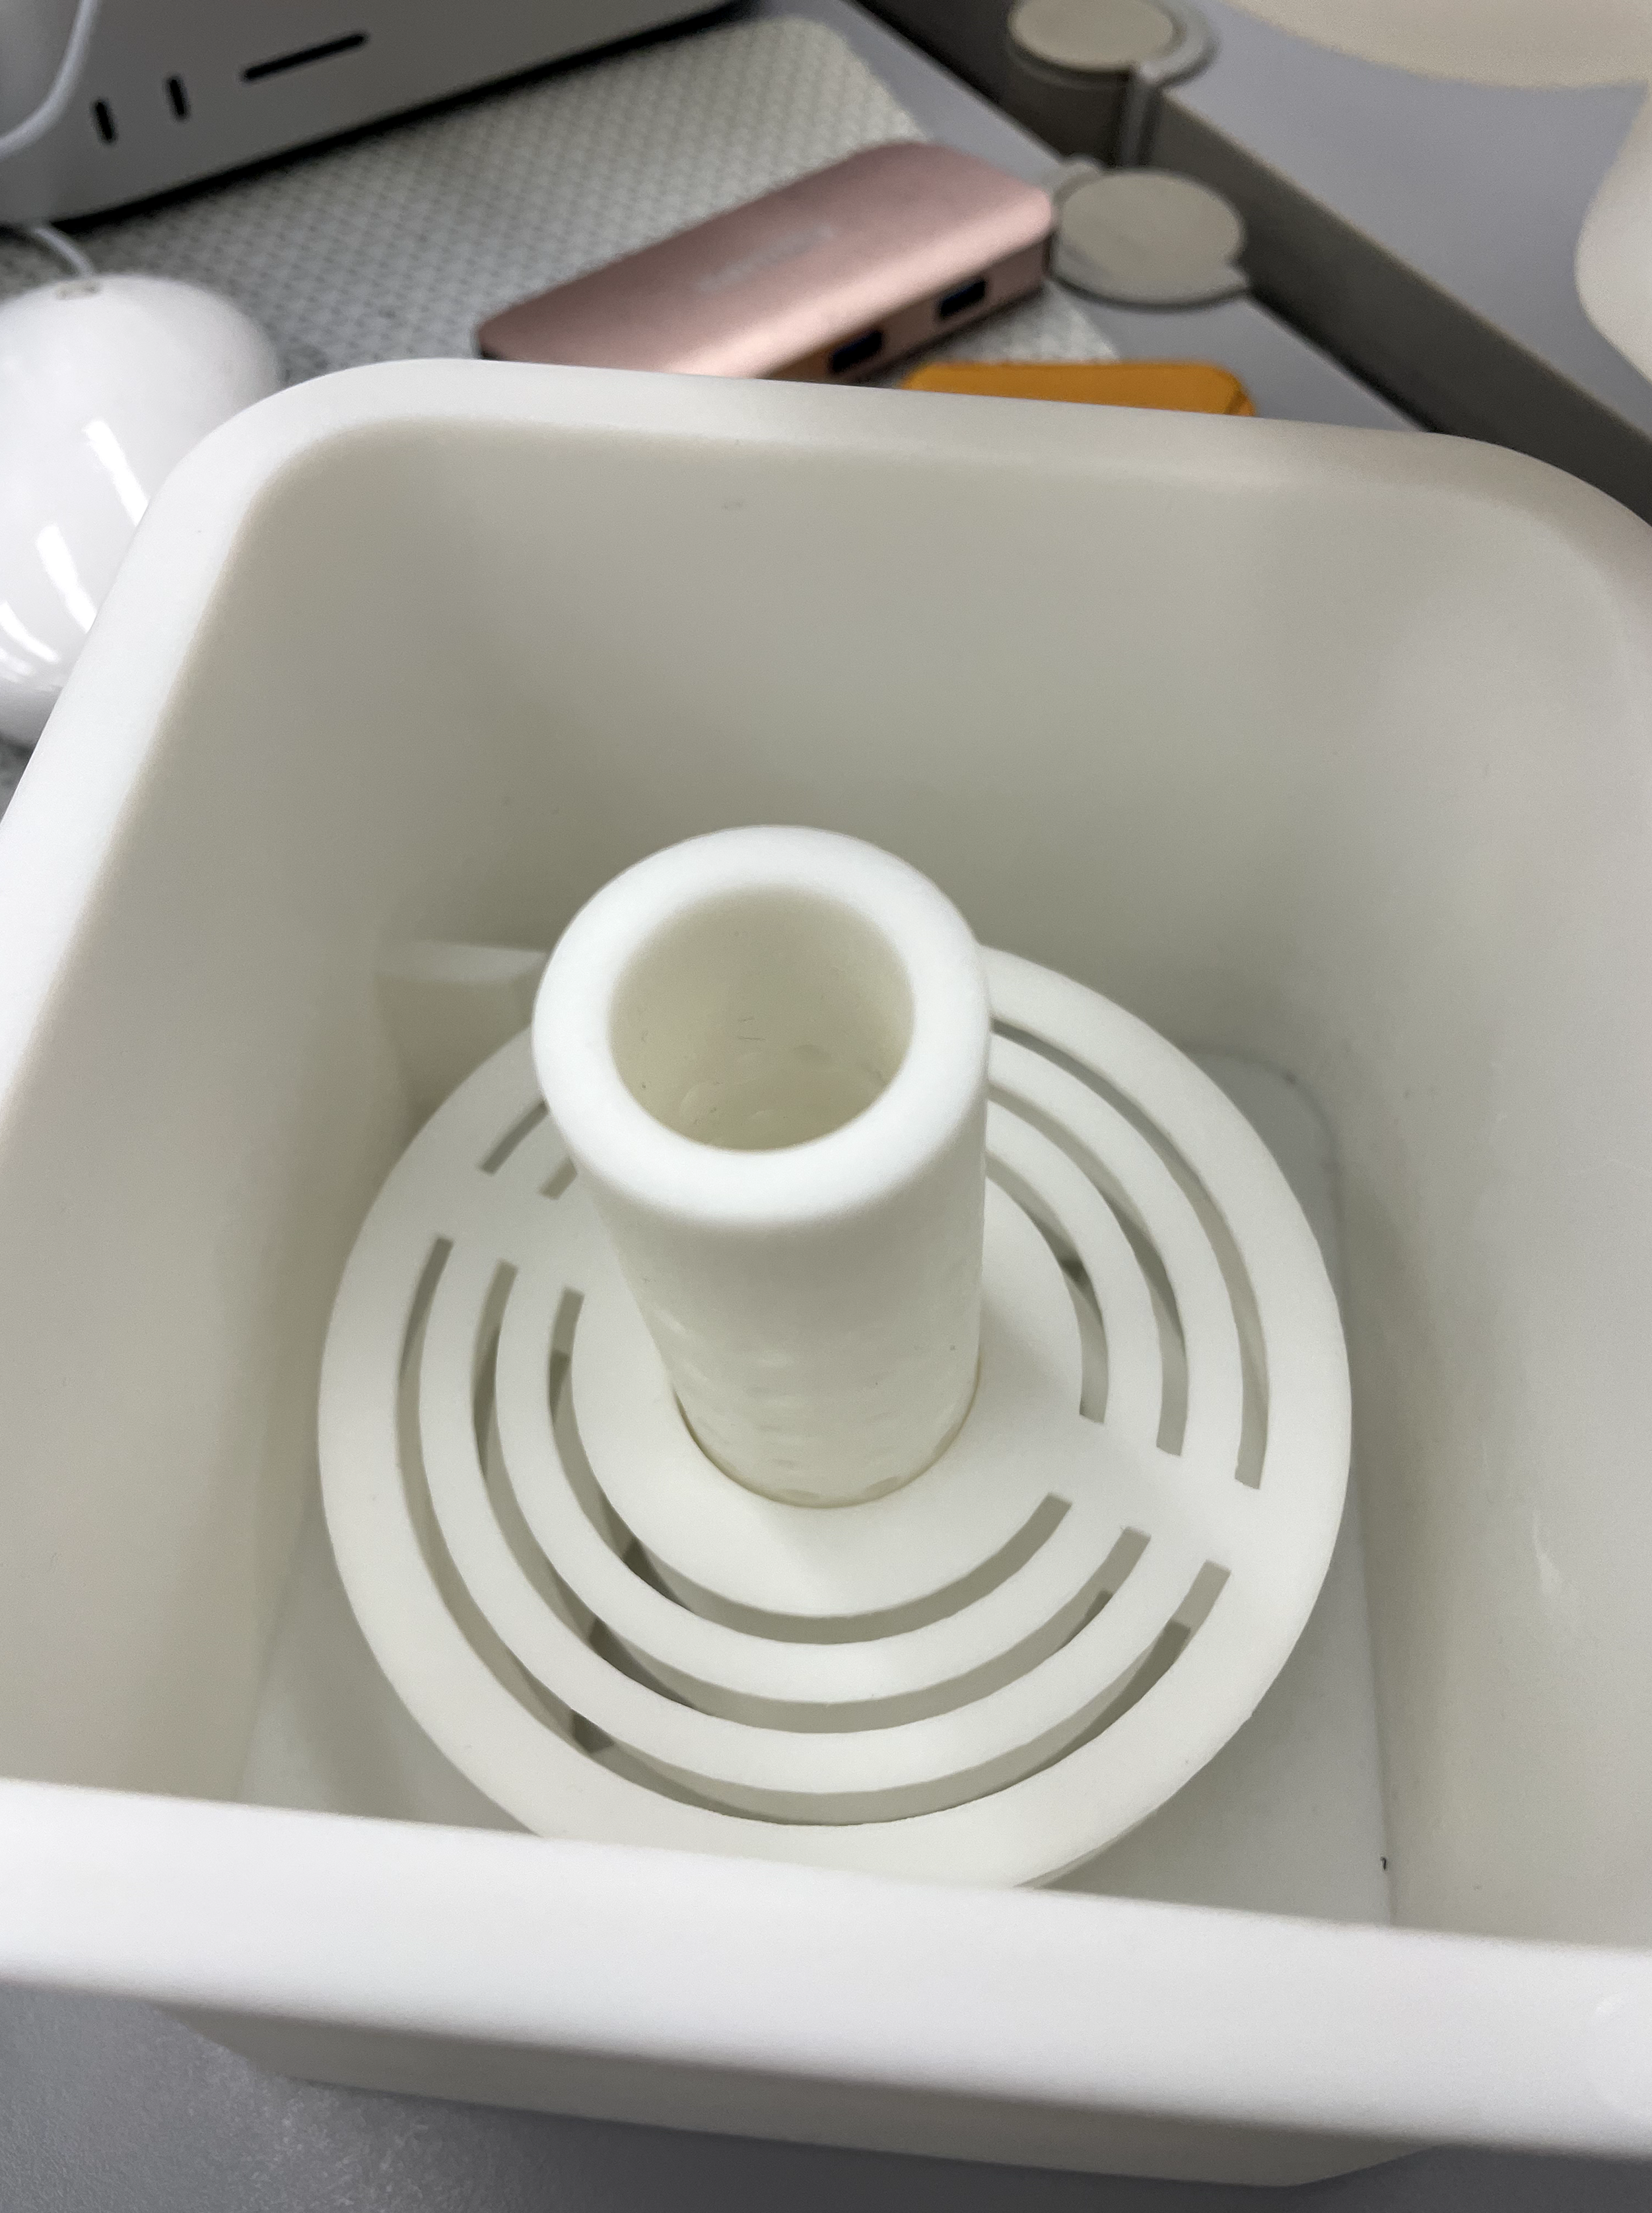
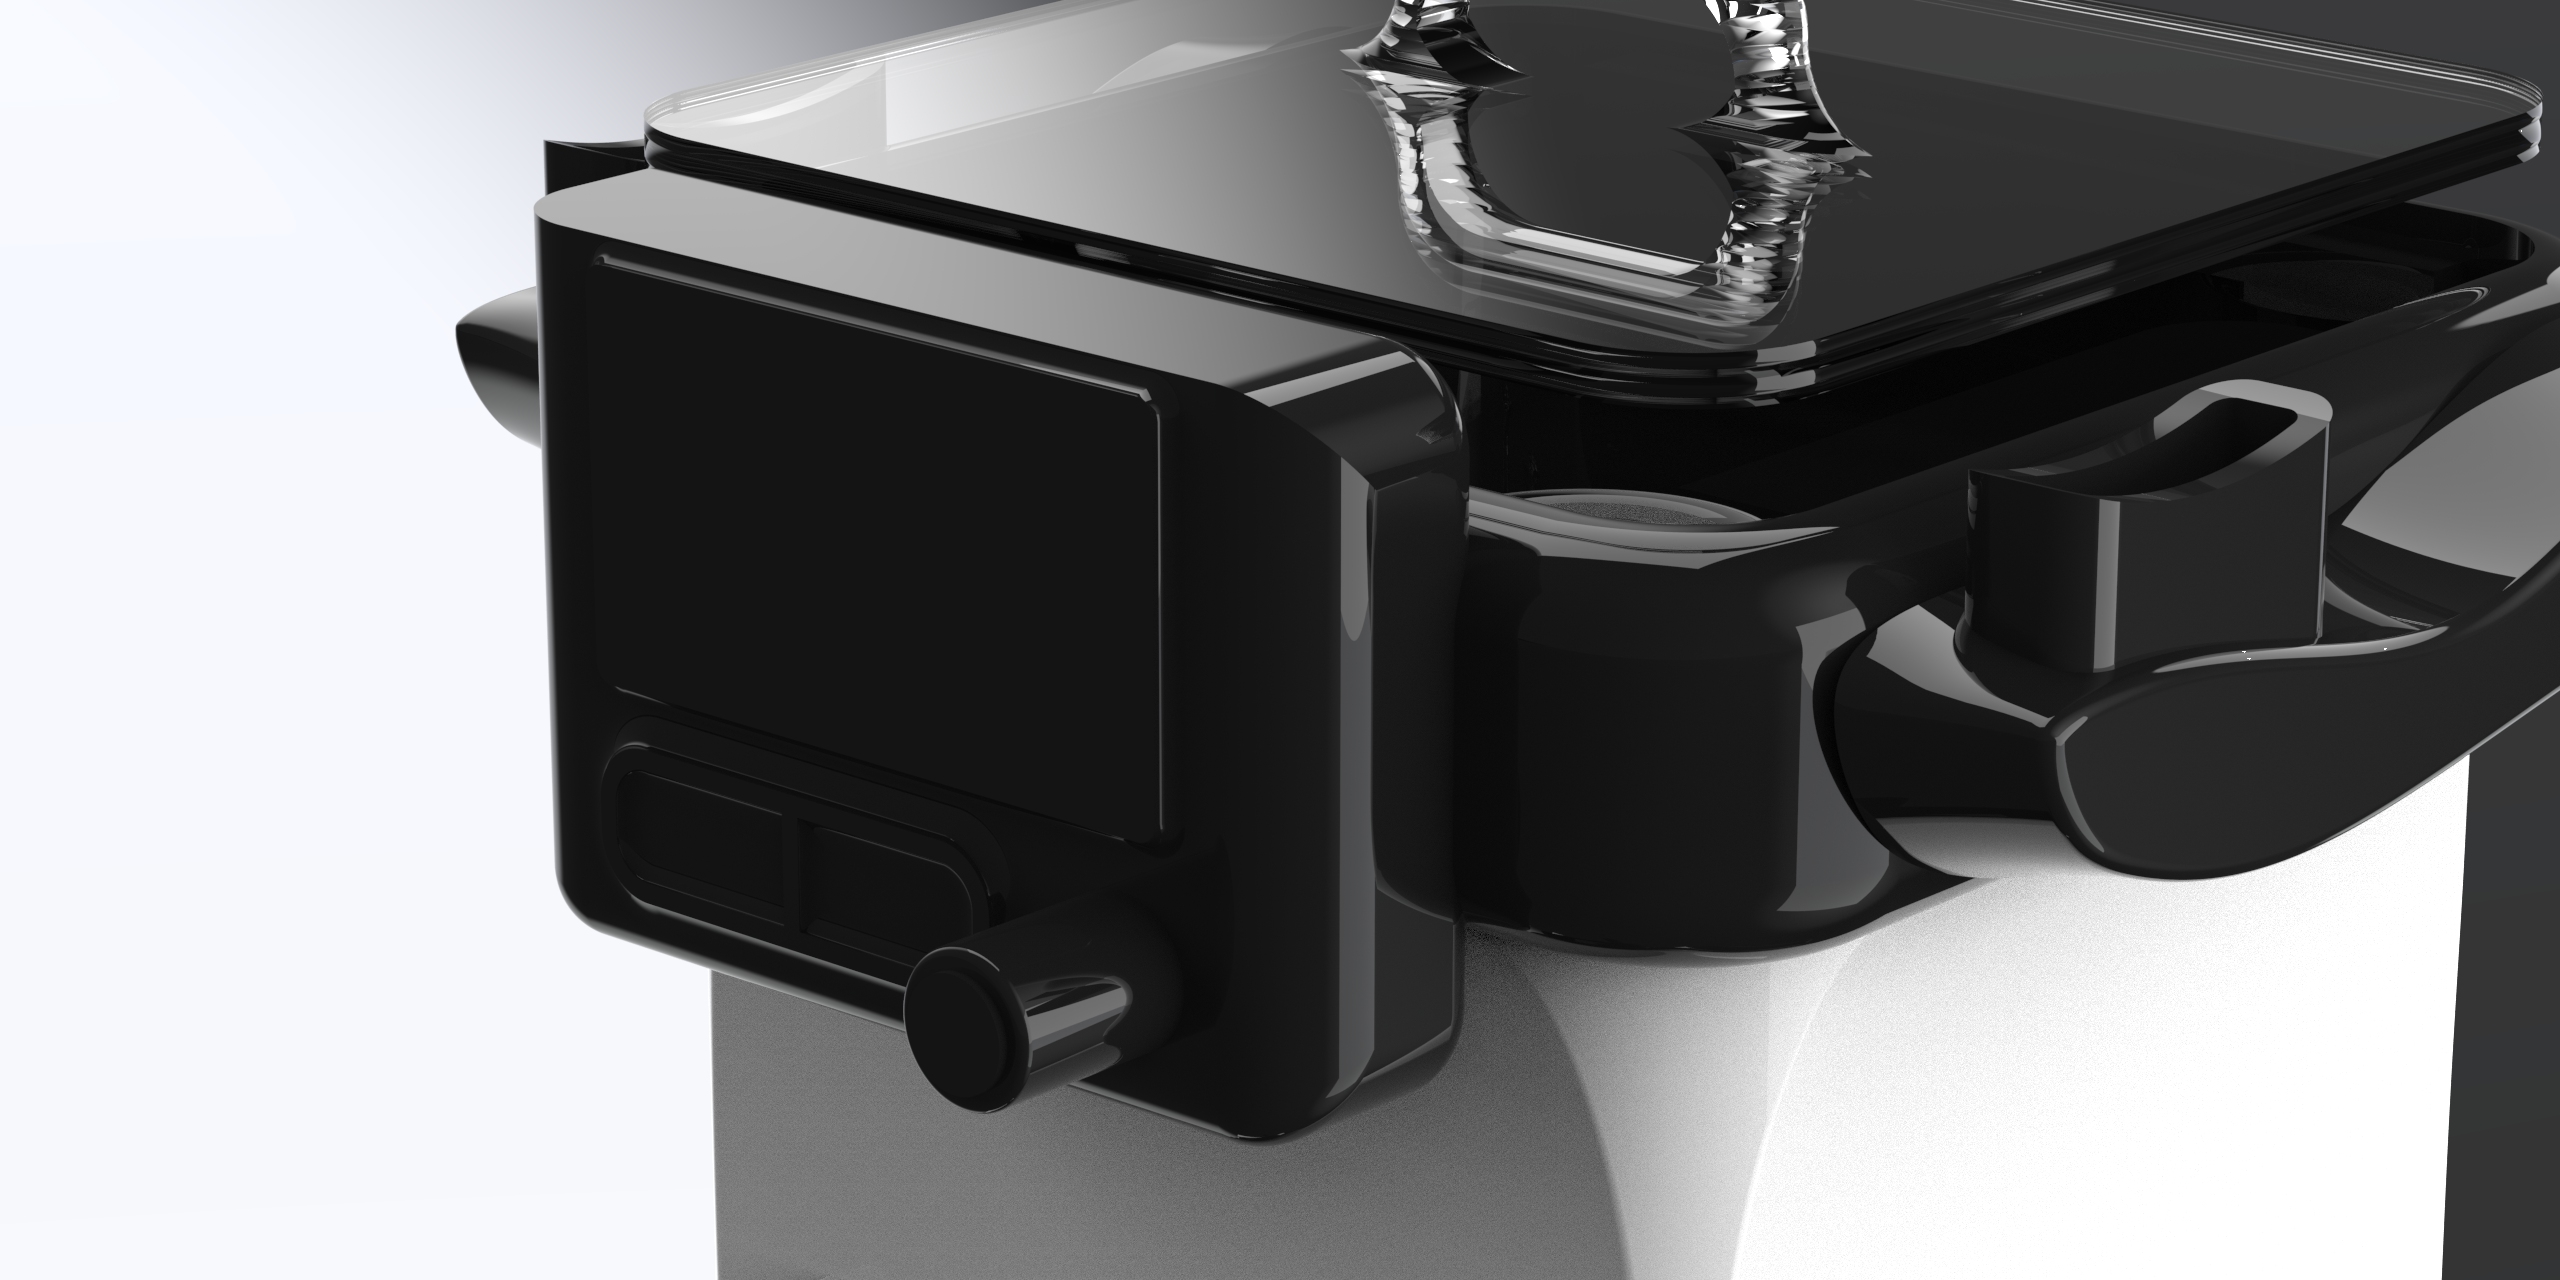
From there the project moved into quick foam mockups to validate scale, then a rapid CAD cycle in SolidWorks. I iterated on the housing geometry, the handle mechanism, and the chemistry cartridge system through dozens of revisions before landing on a final architecture. Keyshot renders helped me study how light would catch the reflective lid and the soft radius along the corners — details that quietly signal quality.
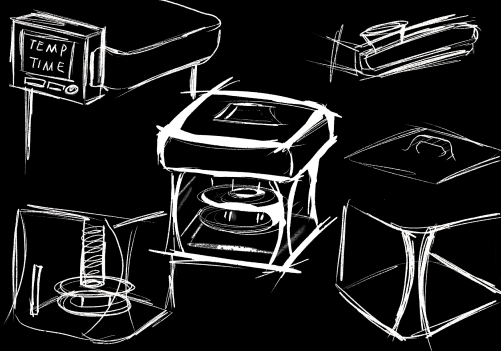
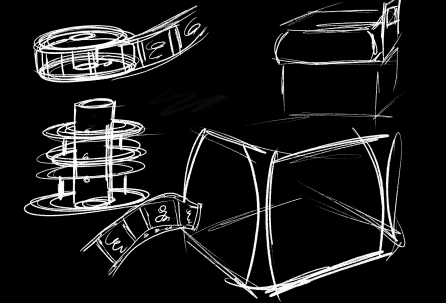
Concept sketches — form studies, component layout & refined perspective

Outcome
The final design balances the cold precision of lab equipment with the warmth of a tool that belongs in a creative studio. The project strengthened my belief that technical products deserve the same care and restraint we reserve for objects meant to be lived with.
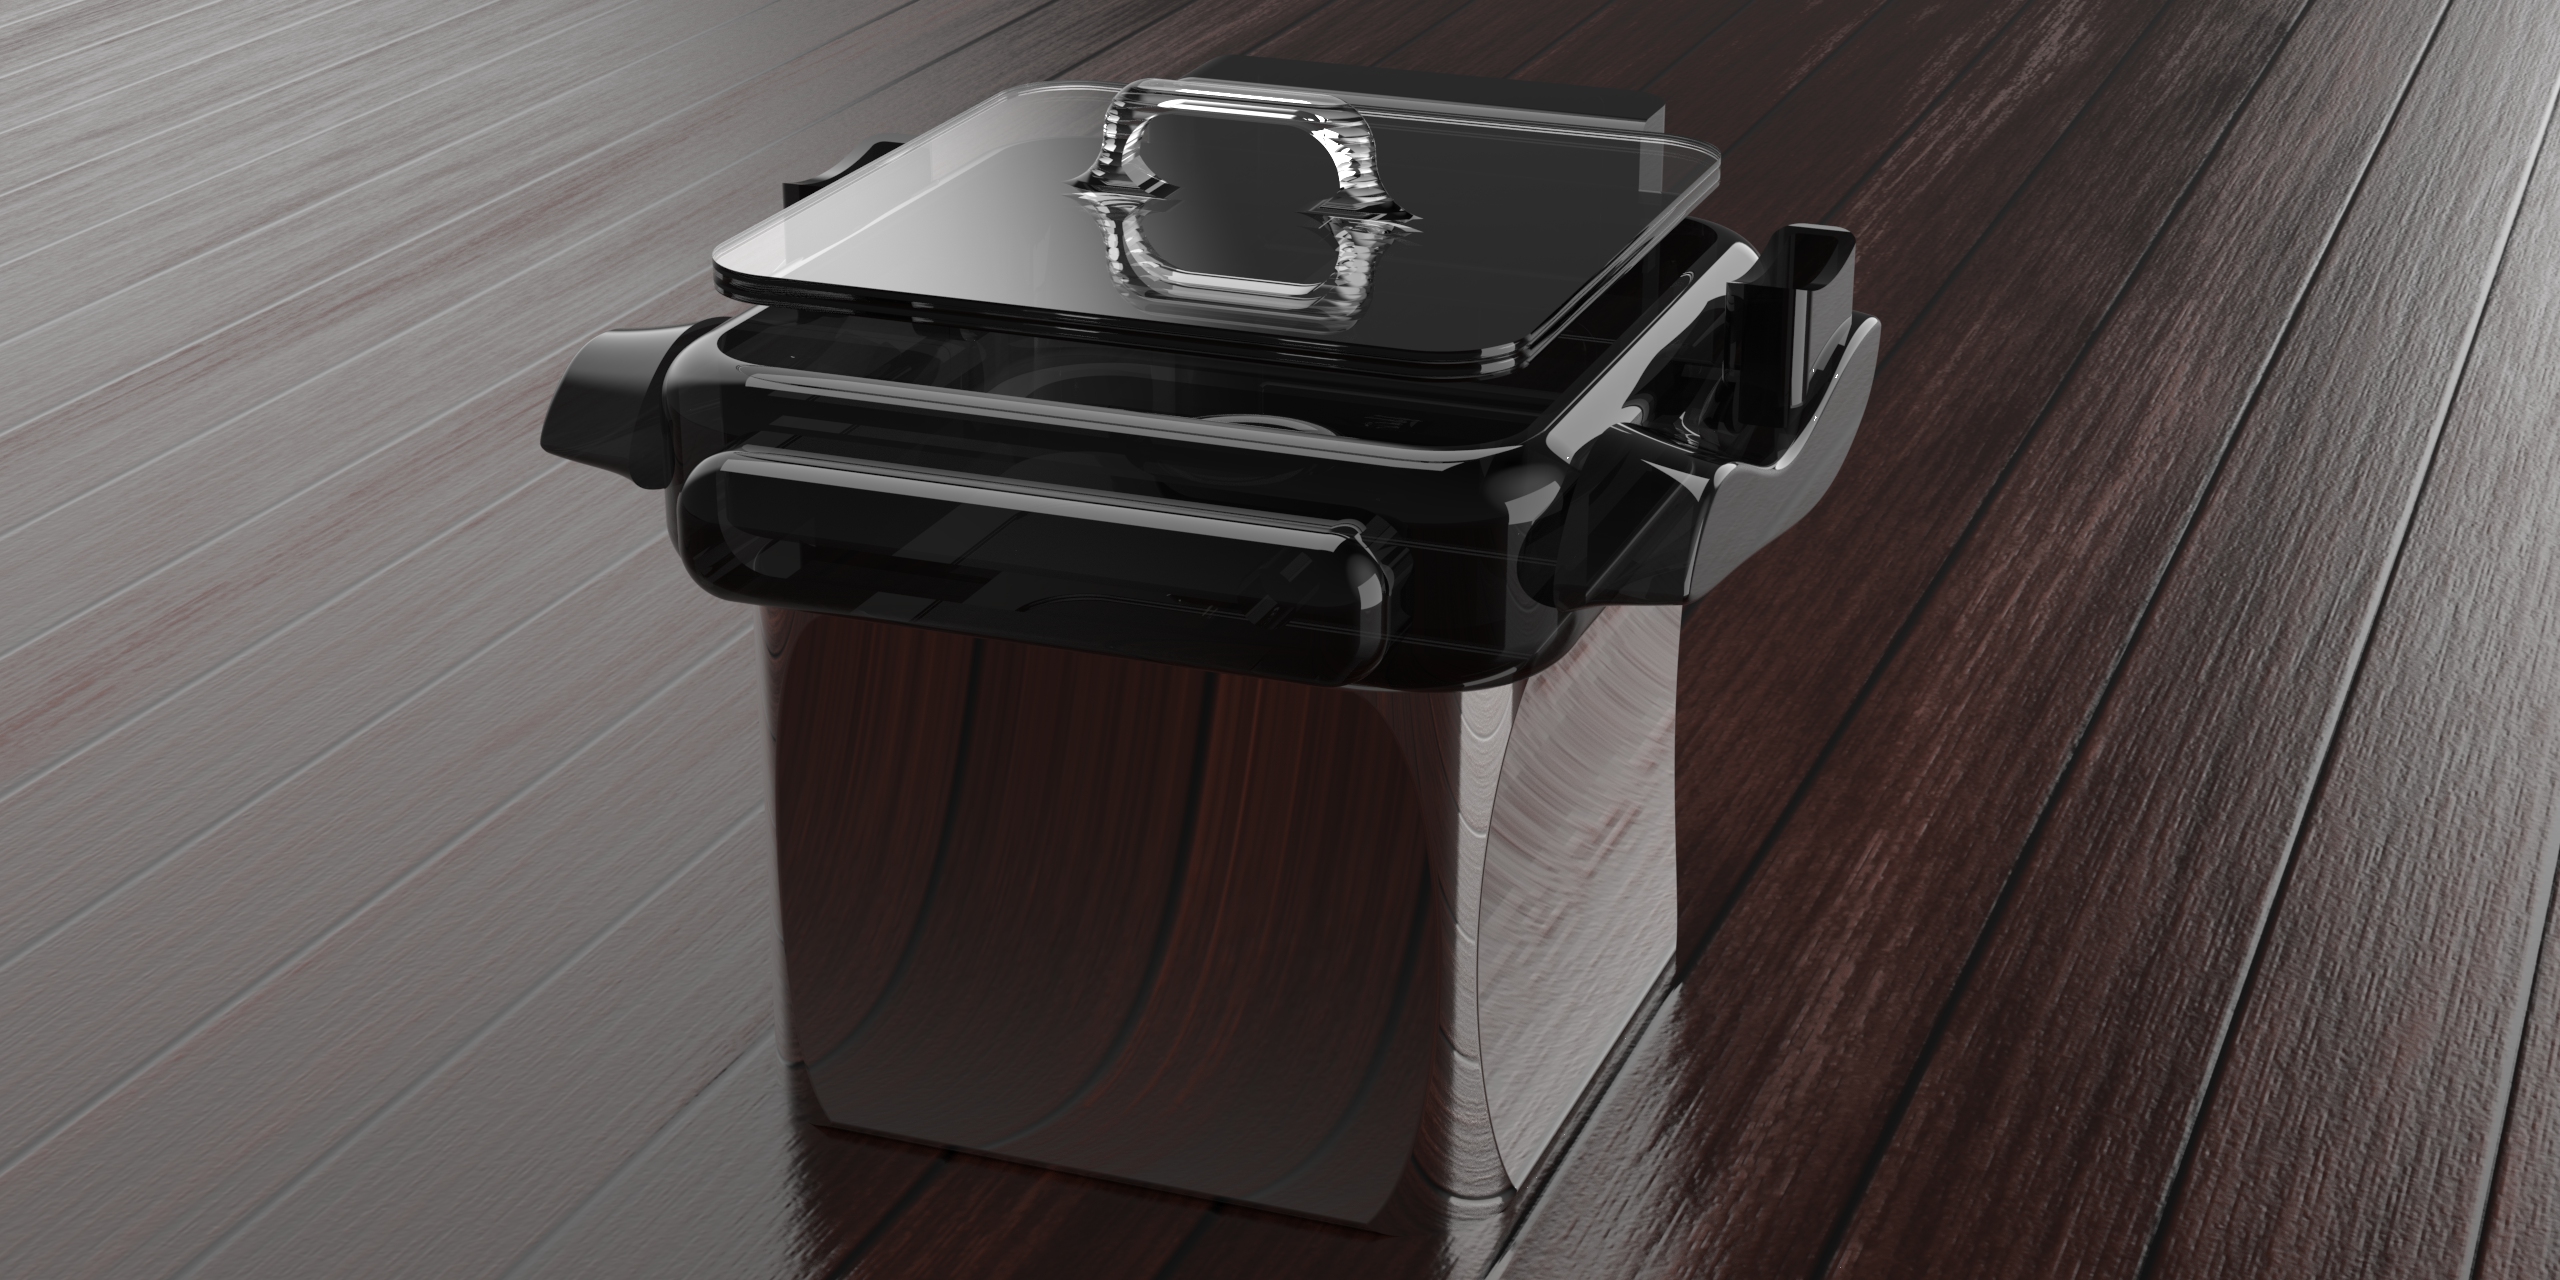
Perspective view — wood surface
App Support
Choose your film stock and the app configures every setting automatically — temperature, timing, agitation. No lookup charts, no guesswork. Just load, tap, and walk away.
Built-in profiles for Kodak, Ilford, Fuji and more — dial in once, reuse forever.
Real-time readout from the onboard DS18B20 sensor, displayed and logged in-app.
Step-by-step agitation scheduling with haptic and visual alerts at each interval.
Every roll logged — film stock, chemistry, temperature, and duration — for consistent results.
The app walks you through every development stage with precise timing and real-time temperature feedback — so every roll comes out exactly as intended.
Developer, stop bath, fixer — each stage timed and prompted automatically.
Haptic and visual reminders fire at the exact moment agitation is needed.
Live alerts if chemistry drifts out of the target range mid-process.
Adjust development time for pushed or pulled exposures with one tap.
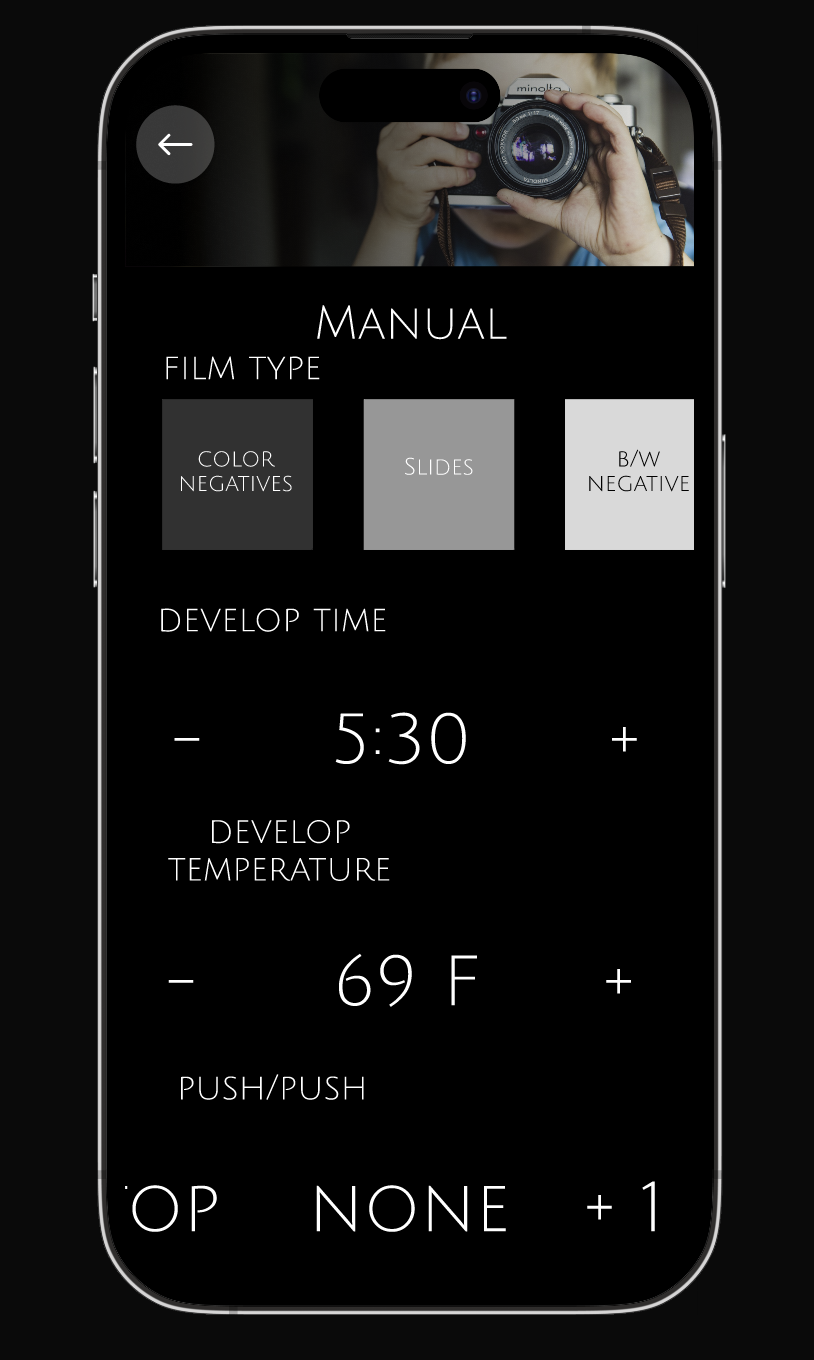
Skip the presets and dial in every variable yourself — film type, develop time, temperature, and push/pull compensation — for complete creative control over the process.
Choose between Color Negatives, Slides, or B/W — settings adapt automatically.
Tap +/− to set your exact development duration down to the second.
Set your chemistry temperature in °F — the sensor monitors and alerts in real time.
Dial in +1, +2 or pull stops to match how you shot the roll.